The Icom series of radios from the IC-746 Pro on to the latest 7800 radios have a 4 memory digital voice and CW keyer built into the radio. These may be accessed by using the menu to access the keyer, make your recording and using the front panel “F” keys to trigger the individual memories. Sadly, the procedure becomes tedious and rather uncomfortable during a 48 hour contest where you might press the various “F” keys hundreds of times by having to reach across your keyboard, paddle and operating desk. The back section of every Icom manual shows the circuitry for an external keypad. The circuit is consisting of 4 resistors and 4 SPST pushbutton switches and a short 2 wire connection into your microphone plug. Finding a suitable box for the switches is a problem and while looking at an old Apple mouse on the shelf the idea came to me that it’s smooth ergonomic design would be great to have my hand on for long durations of time.
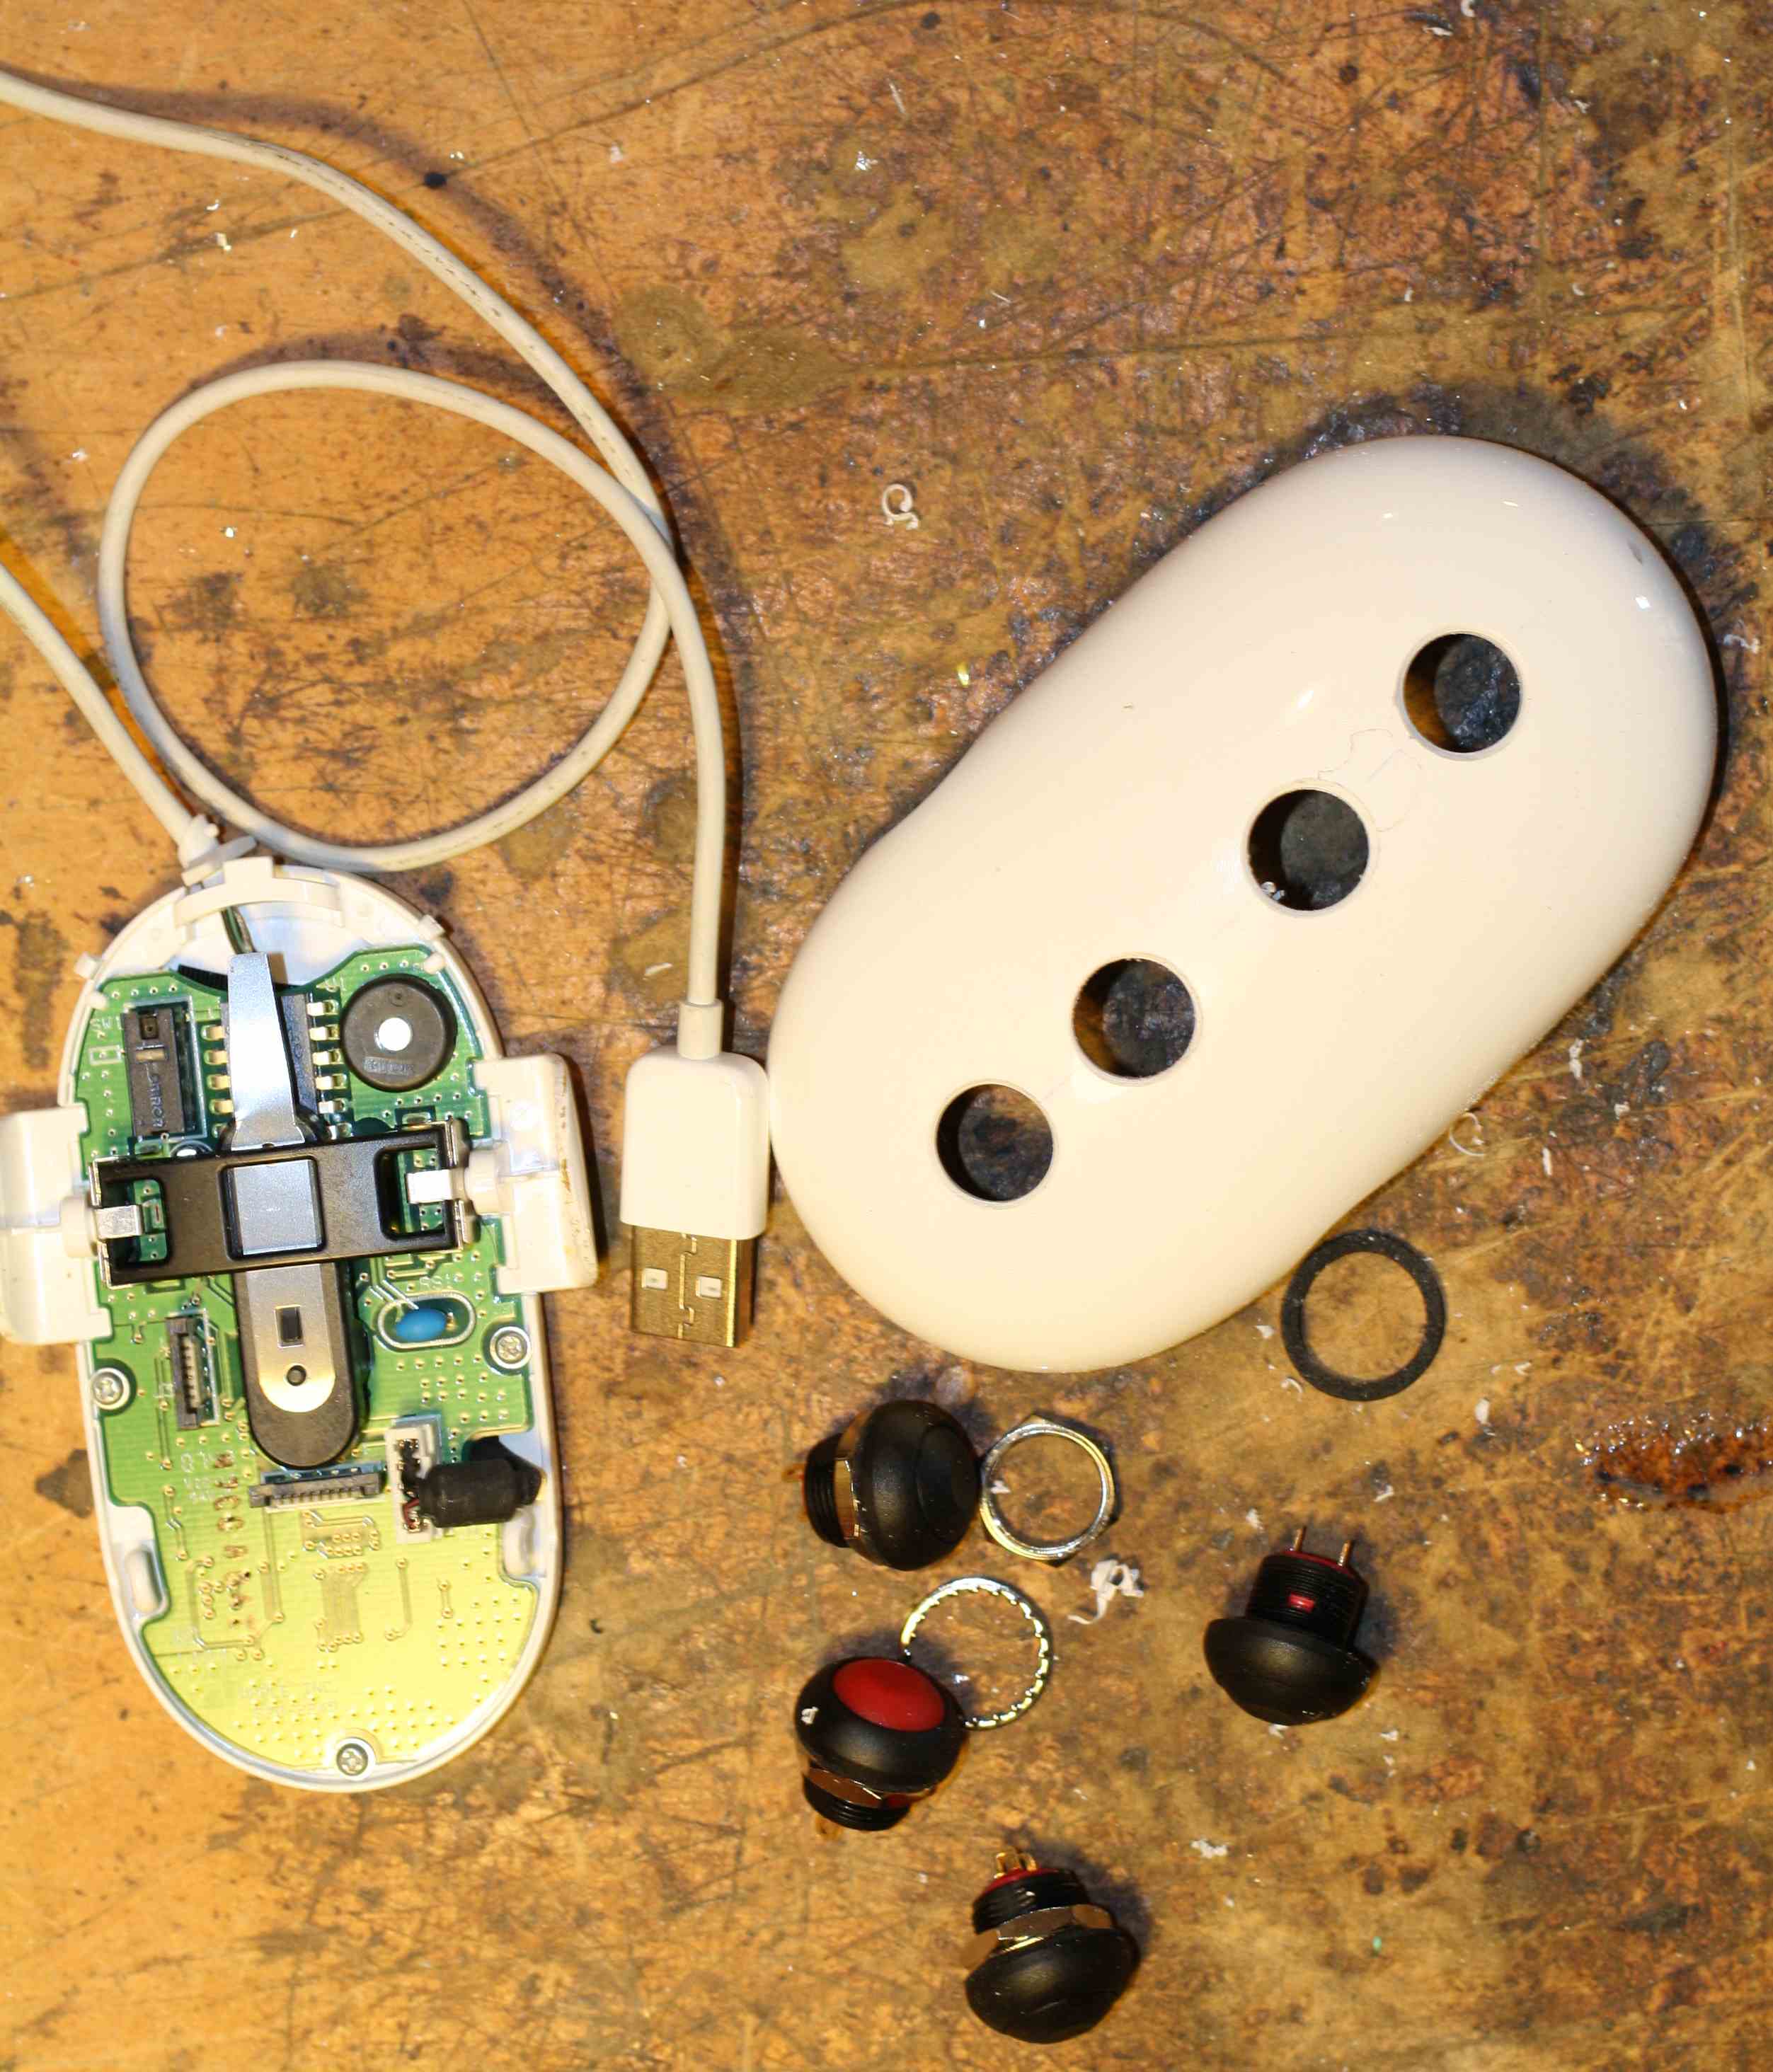
The Apple mouse disassembled with switch holes drilled in upper shell. Lower shell still has circuit board and USB cable attached (All to be removed)
The APPLE Corporation under CEO Steve Jobs were designing some beautiful computer gear years ago and this old mouse was a product of that era.
It was easy to use a small thin bladed screwdriver to lever a few tabs and the mouse fell apart in pieces. Discard the circuit board and USB cable which leaves you with a shell and a base. Find 4 suitable tactile easy to push SPST switch push buttons. The electronics parts suppliers have many types to choose from. The red button is for memory No.1 The quality of the plastic is very good and is not prone to splitting. Start the holes with a small drill bit and slowly increase the size as required. Mount the switches in place and solder the 4 resistors in place. Connect the cable with a 3.5mm plug on the end. Any old old audio cable with the plug attached cut to length will do. I secured the cable in place with a dap of glue from a hot melt glue gun. The inside of the top shell is shown below.
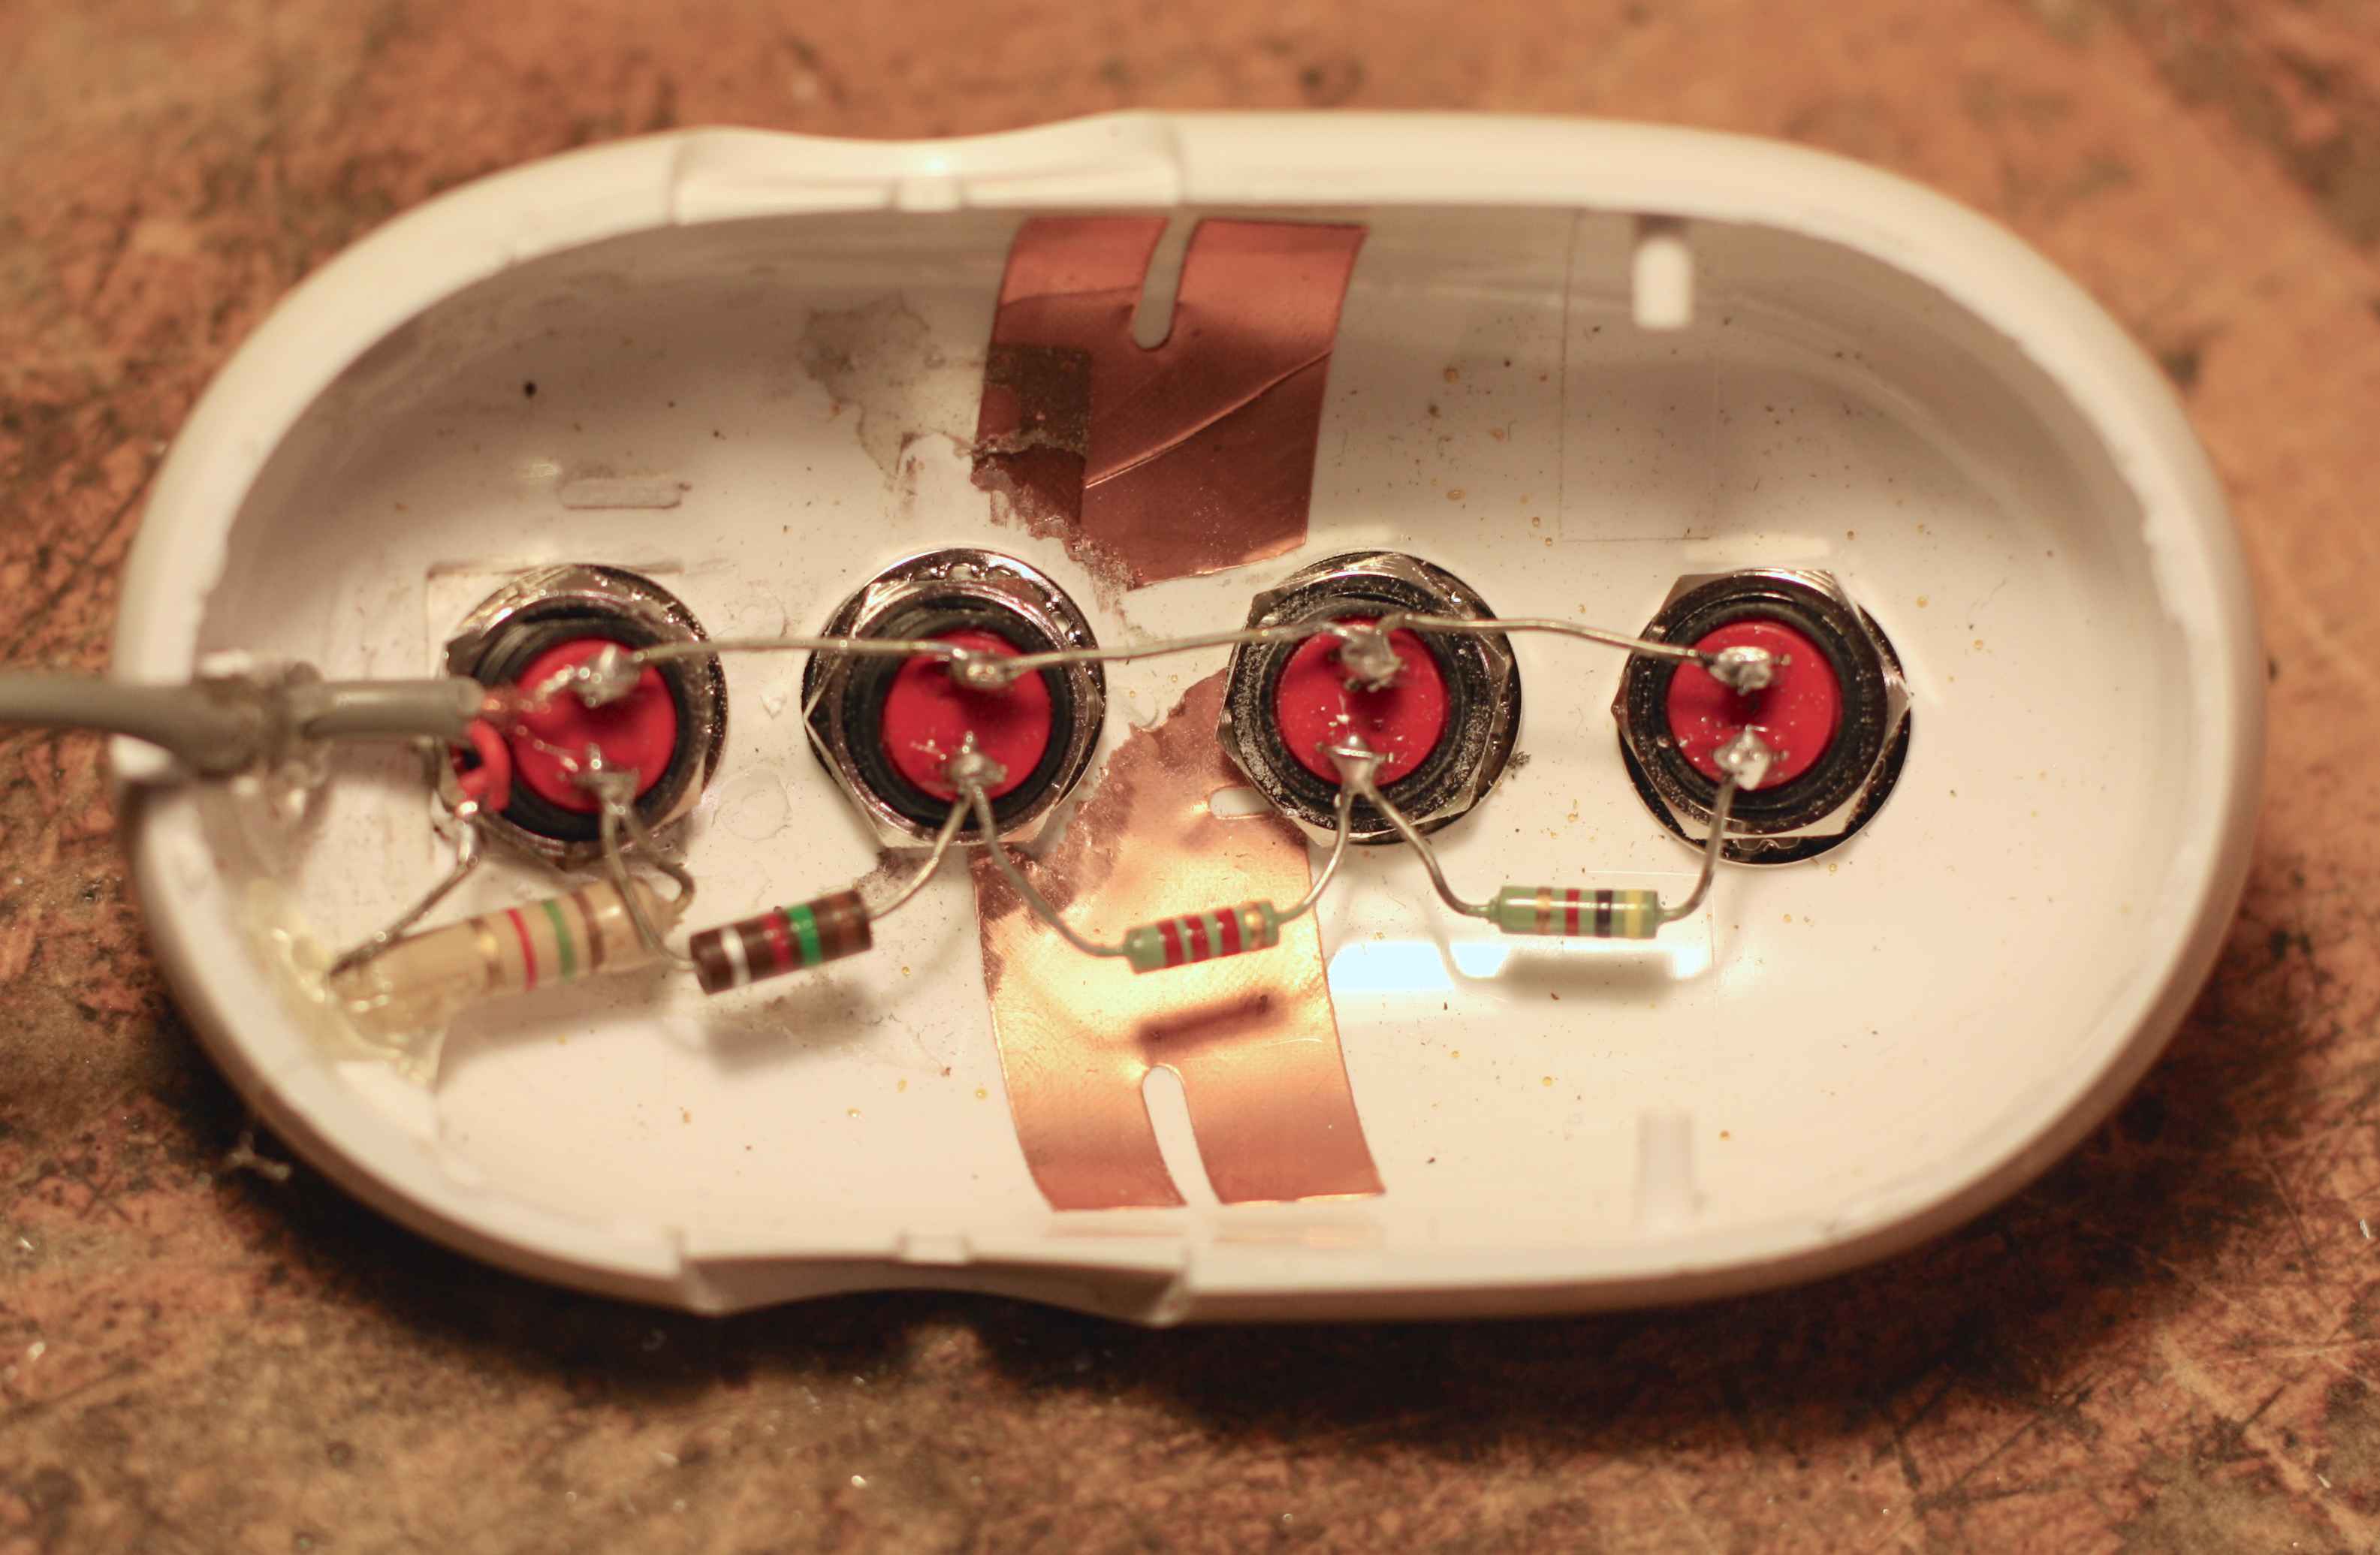
Upper shell with switches, resistors and new cable in place.
The upper and lower shell halves should be mated together again. A little super glue will hold them in place if you the tabs don’t align as they should. The finished iKeyPad is shown below.
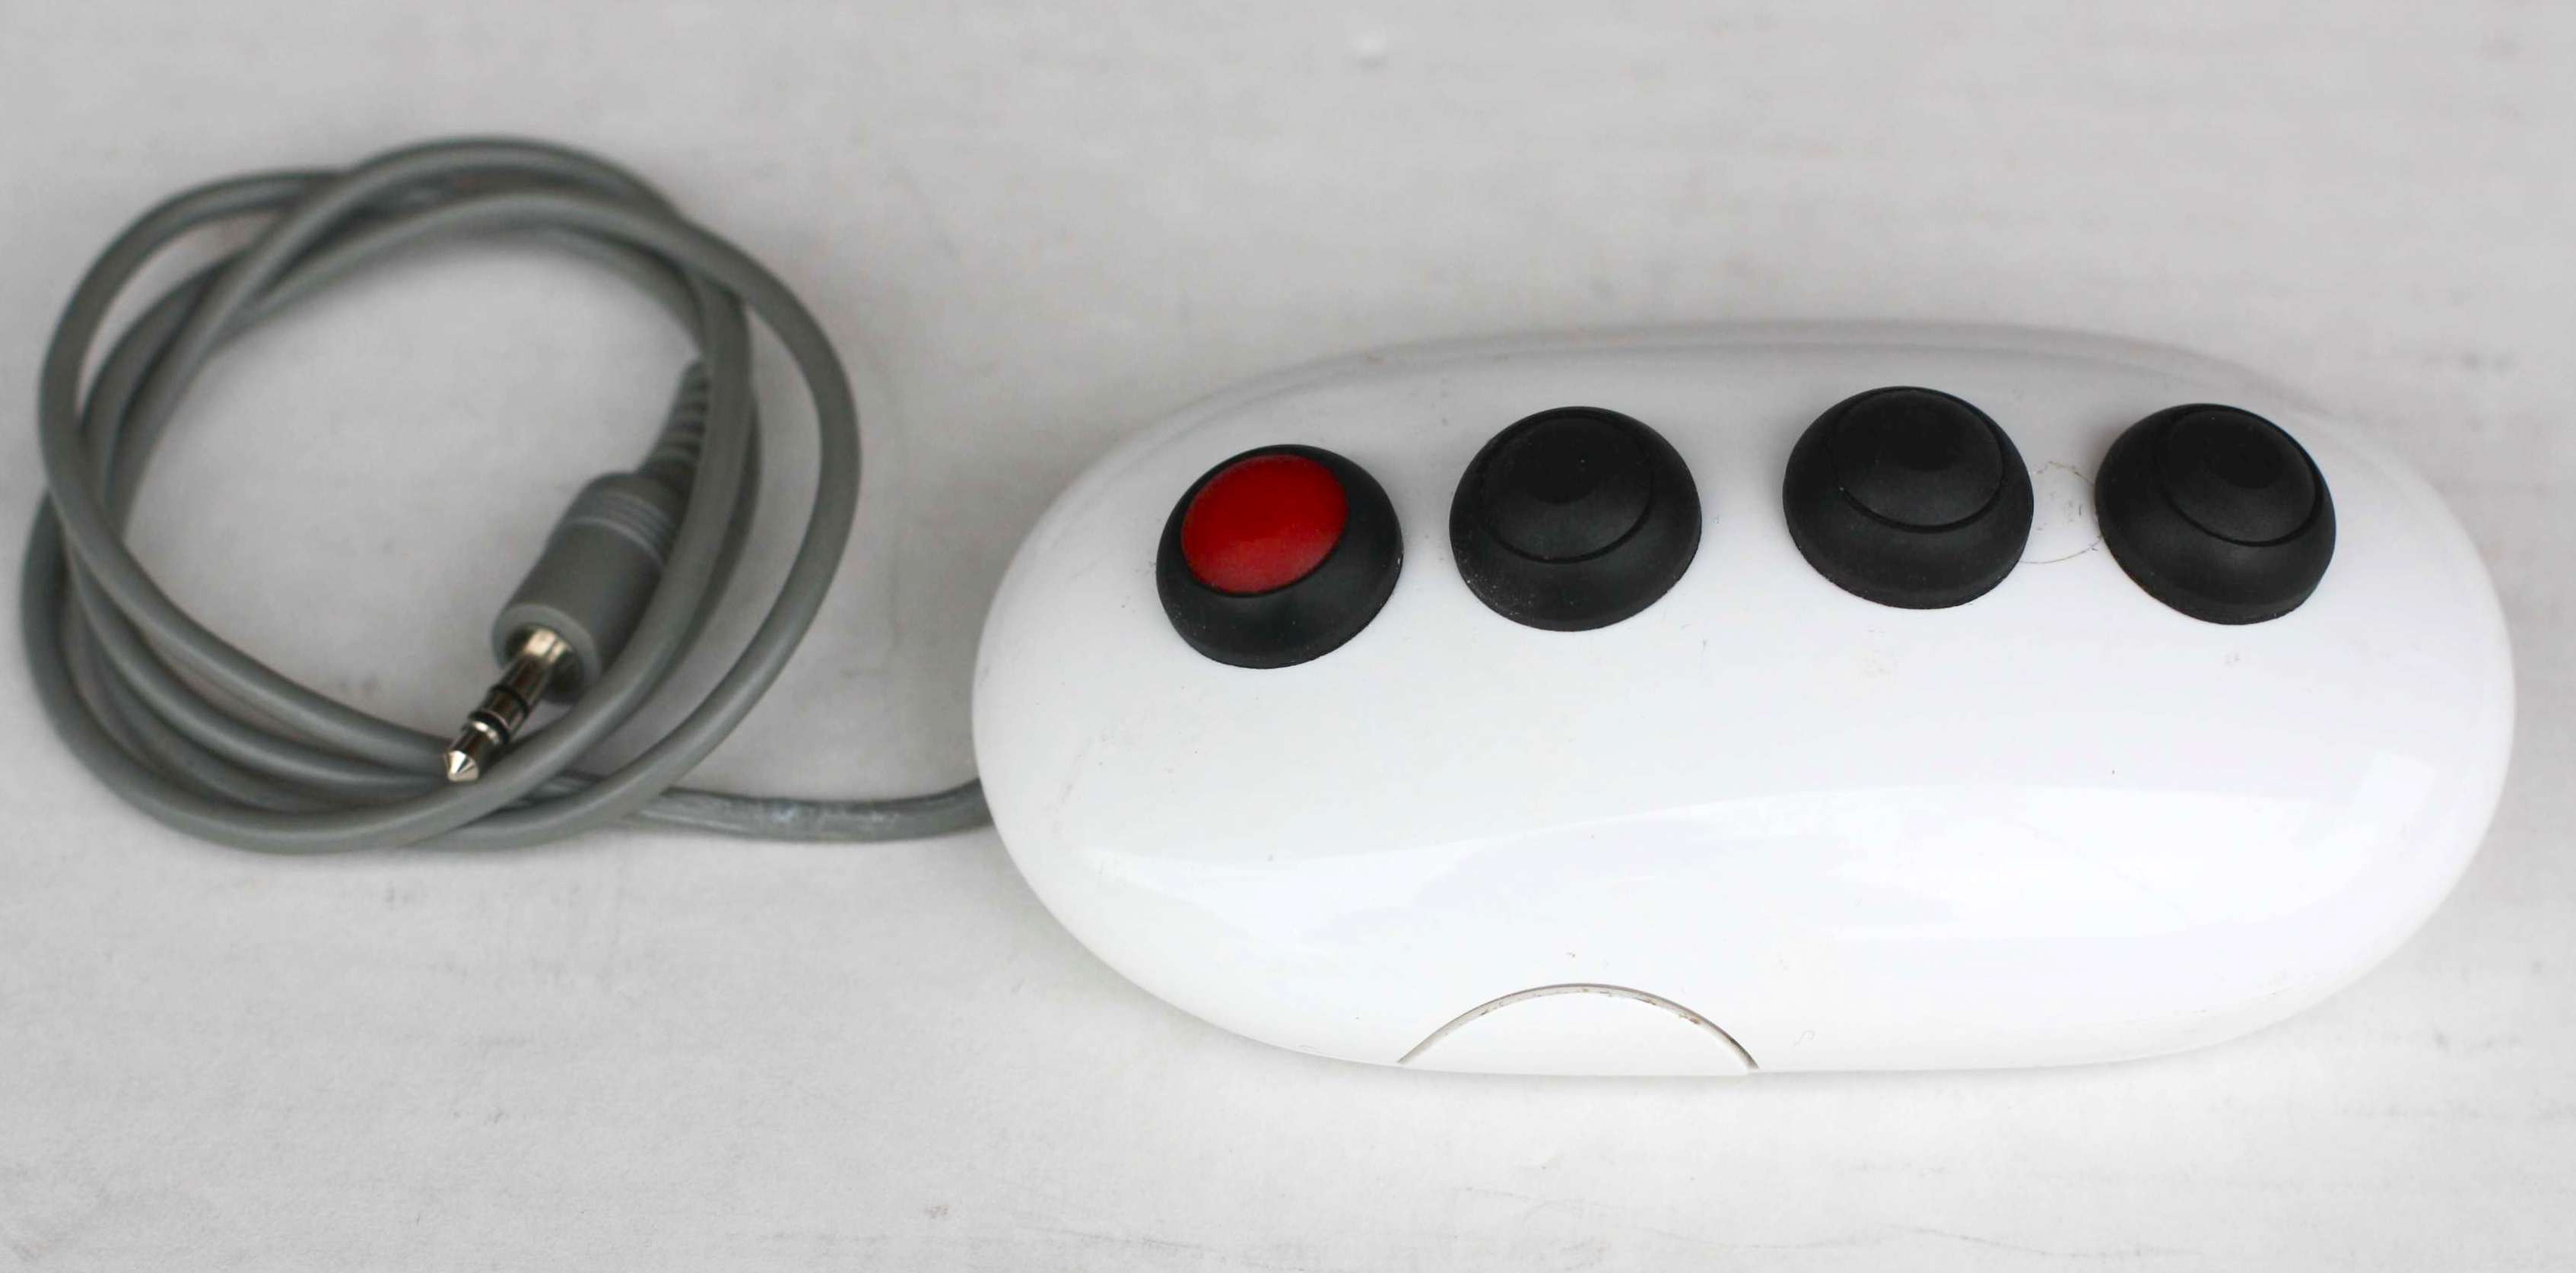
The completed iKeyPad ready to use.
The next thing you must do is connect a small lead from inside your microphone plug to a female 3.5mm socket so that you can plug the iKeyPad into it. Pin 3 is the resistor nework and Pin 7 is the ground for most Icom radios. The only thing left to do is go into the menu system in your Icom radio and allow the keypad feature to work instead of the microphone scan feature. Another menu item will allow the iKeyPad to operate the 4 memories on both CW and SSB modes. The original Icom circuit of the external keypad is below.
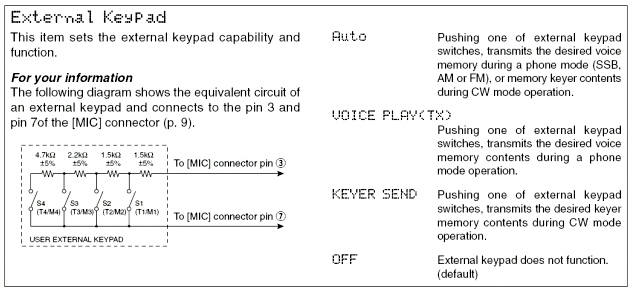
Icom Keying circuit
Operation is a pleasure. Accessing memories from a keypad is so much easier than pushing buttons on the front panel. The inbuilt Icom digital voice and CW keyer is a pleasure to use. The Icom voice keyer sounds absolutely natural and all audio level parameters are adjustable. Make sure the compressor control is off when you do your recordings. The cost of the iKeyPad is nearly nothing if you can find an old Apple mouse. Of course, any mouse of any brand will also work fine if the housing is suitable and comfortable.
73, Lee ZL2AL
I really like your design for the iKeyPad. I would like to find the SPST pushbutton switches that you used. Could you please tell me the supplier and part number of these dome shaped pushbuttons.
Thanks,
Bob
KC8MLB
73