Introduction to the World of DXing

AN INTRODUCTION TO THE WORLD OF DX by Lee Jennings ZL2AL

DXing is addictive
The greatest lure in amateur radio is to contact someone else in another country. When you first start out into the world of DXing, DX may be 100km but later you will work into every corner of the planet. With some hams, it becomes an absolute obsession and they will go to any length to contact that country they haven‘t worked yet. For others, it is a pleasure to rag chew with an amateur in a foreign country and to learn more about that country and its culture. DXers often end up meeting other DXers when they travel and many lifelong friendships are made this way. DXing is a competitive sport. You will find out the moment that you hear some rare DX that a thousand other hams heard that same station and are also calling at the same instant. The problem is that many of your competitors are outstanding operators with high power, excellent antenna systems and vast experience. Most of your competitors are average operators with average stations and antennas and they are easy to compete with. You just have to be a bit more cunning with your skills but eventually you can work up to competing with the top group. That rare DXpedition will usually work the big guns first and then you can easily make the contact at the end of their stay at the rare location.

Currently there are 340 DXCC “Entities “eligible for the ARRL DXCC award program. DXCC is the premier award in ham radio and entry to the “Club” may be gained by working and confirming 100 entities. An Entity can be as large as Australia or as small as St Peter and Paul Rocks out in the South Atlantic Ocean. There are rules that govern what constitutes an “Entity“ and they may be found on the ARRL Website where you can find the rules for the various awards and download the application forms. CQ Magazine in the USA that runs the Worked All Zones awards program and sponsors major contests throughout the year has the rules on their web- site also. Usually you start off with trying to work the first one hundred countries or entities and that will be a milestone for you. It will teach you how to get involved with a pileup and how to be a bit cunning when you do. It will teach you that other DXers in other countries may not have the same sense of fair play as you do. The second 100 countries are a little more difficult to work. Achieving 300 countries is very difficult and will usually take many years for a variety of reasons including sunspot cycles, the rarity of the country and how often its government will allow amateurs to operate there. Currently (2013) there are 340 DXCC Entities and the last 40 entities are extremely difficult to work. Very few ZL amateurs have managed to do lt. But the challenge is always there and it becomes a passion to achieve lt.

Strategies for successful DXing
There are some proven strategies that work. Listen to the operator and find out where he is listening and if he is working split frequencies. Working “split is not difficult, just different. lt‘s a new skill for you to learn. Find out where the thousands of other operators are transmitting and avoid the pack. Position yourself just off the edge of the pack. Refine your timing so that you will be heard in a “gap” rather than in with the pack. Placement and timing is everything. Your signal should be slightly out of the pack so you will be noticed and your call should be slightly out of sync with the pack and just delayed a bit so that he will hear you start your call but not delayed long enough that you are calling on top of the guy the DX station has already decided to work and is answering. Successful experienced DXers are extremely skilful with their timing and consequently work the DX. You may not be heard on your first or second call or even after a few hours of calling. Be patient! Sometimes it‘s an exercise in pure frustration but persistence usually wins and it‘s an absolute joy when you snag that new country. Top level DXing is not easy but you will learn that amateur radio is more than inhabiting your local 2 metre repeater. You will also be rewarded with friendships around the world and an understanding of other cultures.

Is CW worth the effort?
lt really is true that it‘s easier to work DX on CW than on Phone because there are fewer stations clamouring for the attention of a DX station on CW. CW will still be around for the foreseeable future in spite of recent changes in amateur licence regulations around the world. Weak CW signals are more readable than weak Phone signals. Hone your CW skills. DX stations often run 20 wpm or more and while most of them are courteous and will come back to a station calling at 12 or l5wpm, it‘s very satisfying to be able to work them at the speed they‘re calling CQ. Life is much easier with an electronic keyer as it takes the work out of sending your call over and over. There is nothing worse than operating with a pair of uncomfortable, ill fitting, harsh sounding headphones. Invest in a good set of headphones to help you dig out the weak ones and avoid fatigue, A better idea is to buy a quality boom microphone headset with a good sounding microphone cartridge.

Work the contests
Contests can be intimidating, but your best chance for working new countries is often during the DX contests. Contest groups often will activate multi-multi stations in rare countries and they are easy to work. I recall working CN2R in Morocco on 80m a few years ago. Re was S9+ and begging for 80 m contacts and very easy to work. You don‘t do not have to work the entire contest, nor do you have to send in the logs for scoring. Figure out what information they‘re expecting you to exchange with them, either by listening to several contest QSOs or by reading the contest rules on www.contesting.com then just jump in and start working stations.

What bands to operate
The seven popular amateur radio bands offer the DXer propagation to most parts of the world most of the time. When the sunspot count is between the eleven year peaks, the higher bands like 10, 12, 15, 20 M are poor and opportunities are limited. 40M and 80M come into their own and some excellent DXing abounds providing you have good antennas. DXing is more difficult on 80 and 160m because the ambient noise levels are often intolerable in urban areas. When the propagation is right and the bands are open at sunrise and sunset, 80 and 160m can be extremely rewarding with worldwide contacts. We are fortunate here in the Asia Pacific region as many rare DXpeditions take place and are easy to work on the lower bands. When the sunspots reach maximum every eleven years the higher bands are magic. The next peak will be in 2012. 10, 12 and 15m will often be open 24 hours a day and lt is relatively easy to work 100 countries during a weekend contest. Having a ZL call is a wonderful asset. ZLs are reasonably rare in other parts of the world and there are not that many ZL DXers to compete with. ZLs are often the first “real“ DX station that Europeans work. ZL DXers are respected around the world and we have some world class Kiwi DXers amongst us. It is not uncommon to call a CQ on 15 or 20M and generate a pileup of Europeans or North Americans that may go on for hours.

Operating aids
The DXer has far more tools at his disposal than he had 30 or 40 years ago. Then, you heard a rumour, read monthly DX magazines or received a phone call from a trusted friend. You listened daily, you waited and finally you would hear that weak rare station and attempt to work him with primitive valve equipment. Today‘s modern DXers have computers with the Internet based newsgroups, real time packet clusters, propagation prediction programs and information not dreamt of by old timers in the game. Today one knows where and when the rare DX will operate. With a few mouse clicks the modern well equipped station will change the radio to that frequency and mode, track the amplifier to the right band, select the correct antenna system, turn the beam to the heading and set his call up in the logging program in a few seconds. Sounds easy! The reality is that you still have to use your skills to get your call in his electronic logbook. And it doesn‘t get any easier as thousands of other hams have the same technology. Below are some web links to programs and services that will help you work DX.

www.ac6v.com/ -The definitive reference site for ham radio— Over 6000 links.
www.dxatlas.com/ – DX Atlas—A great program for DXCC, WAZ, IOTA info plus brilliant Grayline and path headings.
www.qrz.com – The online address and QSLing data base for most hams around the world.
www.eham.com – A great source of info on general ham radio
www.contesting.com – Keep up to date with international contests
www.dx4win.com/ – Excellent logging program.
www.writelog.com/ – Excellent contest logging program.
www.kc4elo.com/index.htmI – Free but very good logging program.
www.eqf-software.com/ – Some great logging programs.
www.qsl.net/w6elprop/ – Propagation prediction (and it‘s free!).
www.rchalmas.users.ch – DX Cluster program (and it‘s free!).
Subscribe to the KiwiDX List Newsgroup You will be in touch with other keen DXers around New Zealand.
—The CQ Magazine awards and contest website.
www.arrlorg/awards/dxcc/ The ARRL DXCC awards and contest website.
www.dxawards.com/book.html – The K1BV Awards directory listing for 3227 awards.
www.oh2aq.kolumbus.com/ dxs/ – The DX Summit – Live DX cluster spots 24 hours a day.
www.ac6v.com/morseaids.htm – The definitive web page on Morse code—worth going to even if you don‘t understand it or use it!

Packet cluster networks
Packet clusters have been a phenomenon of the DXing world over the past 10 or 15 years. Basically lt works like this. There may be a local Internet based Cluster or VHF packet channel Cluster in a city in Europe somewhere and a group or cluster of hams are connected to it. When someone in the group works a rare station he types into his cluster software the details in the following format: DX 14015 ZD9BV Calling CQ. The last comment is optional. The message or “spot“ immediately appears on the screens of all connected to that cluster. Most clusters are now linked to the internet and there are more than 1000 of them around the world in every populated area. As soon as that spot hits the internet it spreads to all the cluster nodes and you will see it on your screen in your shack. In fact you will see a continuous stream of DX stations, Announcements and WWV information on your screen 24 hours a ay. There are many free programs available. DX packet clusters are a wonderful tool for chasing DX

Minimum-maximum Station gear
There are some facts to consider when you are thinking about investing in equipment for your station.

(1) The Operator on the other end can‘t tell whether you have the latest all singing, all dancing multi featured transceiver costing in excess of $8K or a 30 year old valve radio you picked up at a junk sale for $300. 100W is 100W. Both are equal. The only difference is that the older radio may not have all the latest modern features.

(2) The stations with the 30m towers and stacked 5-el monobanders driven by very large amplifiers will often beat you in a pileup. These are the guys that work the rare DX first and they love doing it. After they have done lt … they go away and let the rest of us work the station. As long as you are aware of the big guns, it‘s not a problem because time will be kind to you.

(3) The stations that have the “best“ sounding audio will always win in a pileup. It is human nature that the DX station will always take the path of least resistance and work the station he can understand and clearly hear the easiest. Best means clean, punchy and standing out from the rest. Commercial broadcast announcers are picked because of their mellow authoritative voices. Be aware of your own limitations and strive for the best audio you can generate. An authoritative voice helps!

(4) With CW – You will need an electronic keyer and clean keying set a bit below the pack‘s general speed. This is better than trying to impress the DX station that your electronic keyer can do 45 wpm with ease. He can‘t! – Well, actually some DX ops can but they are rare.

(5) At the end of the day everything helps, but don‘t get hung up on particular antennas or brands of radio equipment. They are only part of the picture. A good antenna is the second best investment you will ever make. The first is taking the time to learn the techniques and skills of how a rare DX station thinks and operates. A cunning operator will outwit a big antenna every time!

Computer logging
Computer logging programs are almost essential for those who have a large number of QSOs. Over time they become one of the best tools around for keeping things in order. Don‘t start out with a cheap shareware logging program. A key factor in a logging program is to be able to display various award details in DXCC entity order as one has them worked or confirmed. The main prestige awards are DXCC, WAZ, DXCC Challenge, WAS, WAC, IOTA There are thousands of others. When you want to see how your goals are being met, you can look at your statistics right on the computer screen. Computer logging programs are a great time saver because most of them generate data and address labels that will save hours and hours of handwriting. Computer logging can keep track of QSLs sent and received with just a click of the mouse. A really good computer logging program will do all of the above and control your radio, send CW, display your local packet cluster DX spots and print the QSO information directly onto your QSL cards with no labels involved.

The process of QSLing
If a newcomer to DXing starts out by working DX stations during contests he will quickly learn that he will work key countries multiple times. I would make the bureau one of my first choices The QSL Buro Service here in New Zealand is excellent and lt will save you postage costs. If you use the NZ Buro a lot make a donation every now and then! My best advice is to save your postage dollars and greenstamps (One US Dollar) for your rare station direct QSL requests. Confirming DXCC takes time and by the time one gets close to 100 different confirmed countries, several months or years will pass. There are several systems of filing, and the one that is probably the most common is to keep QSLs in order by DXCC entity. Shoeboxes help and they are inexpensive. There are some neat boxes sold buy the big chain stores here in New Zealand to file photographs in and they are excellent for QSLs. Keeping QSLs in DXCC entity order is the first step in being able to find and sort cards for awards later down the line. Believe me, it is not an easy task to sort a couple of thousand QSLs from scratch. Be smart and start sorting at the very beginning.

Awards and rewards
The ARRL DXCC Program

ARRL DXCC Honour Roll, 5 Band DXCC, WAS, 5BWAS, the DXCC Challenge Award and the CQ WAZ awards are the most prestigious awards in ham radio. Actually, there are over 3200 awards available to wallpaper your shack. Only the above few really measure how well you compete with other DXers around the rest of the world. In fact the list of awards that can be earned for working certain collections of DX stations is almost endless. www.ac6v.com/ will give you a link to the universal awards page. We have some world class DXers in New Zealand but only a few ZLs have managed to achieve the ARRL DXCC Honour Roll award. We now have a authrized ARRL DXCC Card checker in New Zealand which means you do not have to send your precious cards to the USA for verification. Contact Lee ZL2AL [email protected] for further information. Your DXCC QSOs may also be verified online on the ARRLs website LoTW (Logbook of the World)

DXpeditions
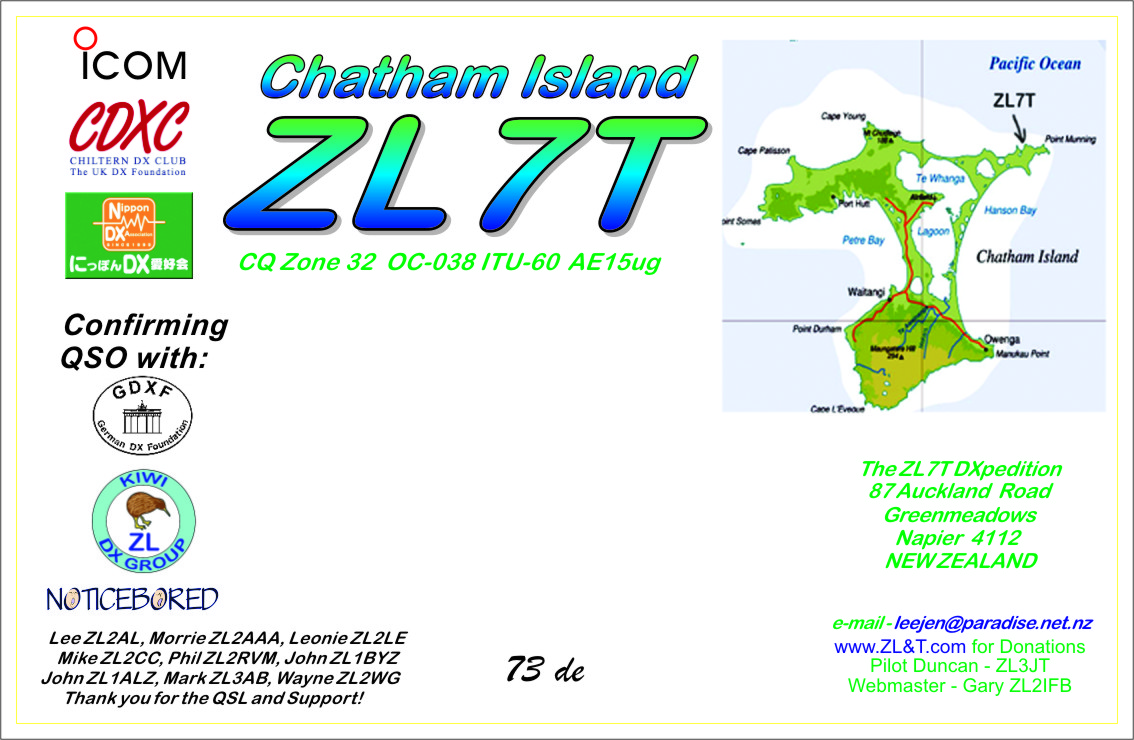
If DXing is an obsession, then DXpeditioners are the lunatic fringe of the DX world. At any given time these are hundreds of amateurs operating from rare locations around the world. You can be assured that there are thousands of others actively planning a DXpedition somewhere and hundreds of thousands of “armchair DXpeditioners“ who would love to go. Planning a major Dxpedition is almost as com- plicated as a NASA mission. Large scale modern DXpeditions can chew through $400,000 or more in no time so it isn‘t a project that can be taken on lightly. New Zealand just happens to have ten or more of some the rarest DXCC entities islands within its territory. ZL7 – Chatham Island, ZL8 – Raoul Island
and ZL9 – Campbell and Auckland Islands are usually in the top 25 most wanted entities. The demand continues unabated and opportunity abounds for ZLs to organize more trips to these desired locations.

It is the experience of a lifetime to participate as an operator on a DXpedition. The camaraderie und experience gained is incomparable. DXpeditions to ZL7 are easily organized, tremendous fun and are to be recommended for gaining experience. When you consider all these factors, it is no wonder that DXing is so popular even though we are at the bottom of the eleven year solar cycle in 2009 there are always rare DX stations around to be worked. As the propagation becomes better over the next few years HF DX will improve. When sunspot cycle number 24 peaks in a few years from now you will experience fabulous world-wide propagation. I am trying to provide tips and information in this section to help you succeed in DXing, whether you are a newcomer 10 DX or a DXing veteran. If you would like to find out more about DXing, contact me at [email protected] and I will be happy to put you in touch with DXers in your area. You should also subscribe to the Google Kiwi DX List reflector for up to the minute information.

The worst day DXing sure beats the best day working!

73, Lee Jennings ZL2AL

Radio Propagation Primer

What goes on in the sun affects our radio propagation around the earth. That is a give. We cannot do anything about it. We, as radio amateurs can only learn to use it or work around it. This presentation of how the sun affects us was presented at the Dayton Hamvention by Paul Harden, NA5N in 2005 and is well worth reading. Click on the link below:

Solar Activity Primer

73, Lee ZL2AL


Band Useage in ZL

Amateur Radio Band Usage From 160 metres to 10 metres
Compiled by Mark ZL3AB assisted by Gary ZL2IFB

Updated 31 Jan 2013

1800 to 1950 kHz – 160 metres (“topband” or “one-sixty”)
1800-1810 Digimodes
1810-1850 CW
1810 CW QRP
1836.6 WSPR beacons
1838 JT65A
1840-1843 Digimodes
1843-1950 SSB
1910 SSB QRP

3500 to 3900 kHz – 80 metres (“eighty” or “seventy five”)
3500-3525 CW DX Window simplex or split, listen for op’s instructions (no local ragchewing)!
3530 IOTA CW
3559 Hellschreiber (Region 3)
3560 QRP CW
3570 BPSK31
3575 Hellschreiber
3576 JT65A
3579 QRSS Beacons
3580 RTTY
3590 RTTY DX
3592.6 WSPR beacons
3600-3900 SSB
3620-3640 VK/ZL digimodes window
3710 QRP CW
3730-3740 SSTV (ITU Region 1)
3755 IOTA SSB
3776-3800 SSB DX window for intercontinental traffic
3791 ALE
3845 SSTV (ITU Region 2)
3885 AM

5060-5428kHz – 60 metres (“five megs”)
ZLs are not currently permitted to use 60 metres except for legitimate emergency communications purposes on either 5320 or 5395 kHz.

7000 to 7300 kHz – 40 metres (“forty”)
7000-7025 CW DX Window simplex or split, listen for op’s instructions (no local ragchewing)!
7030 IOTA CW
7030-7040 Hellschreiber
7035-7040 BPSK31 (ITU Regions 1 & 3)
7035-7045 RTTY (ITU Regions 1 & 3)
7039 JT65A
7039 Hellschreiber
7040 RTTY DX
7040 QRP (ITU Region 2)
70599 QRSS Beacons
7070-7075 BPSK31 (ITU Region 2)
7076 JT65A (USB)
7080 RTTY (ITURegion 2)
7083.6 WSPR beacons
7084 Hellschreiber (USB Region 1)
7075-7.100 SSB Calling Simplex or split listen for op’s instructions
7100-7.200 SSB (Region 1)
7125-7.300 SSB (Region 2)
7171 SSTV
7185.5 ALE
7285 QRP SSB
7290 AM

New Zealand is in ITU Region 3 but ZL amateurs are also allowed to use digimodes on the frequencies allocated to ITU Region 2 (the Americas).

10100 to 10150 kHz – 30 metres (“thirty”)
10100-10110 CW DX Window simplex or split listen for op’s instructions (no local ragchewing)!
10115 IOTA CW
10116 QRP CW
10135-10145 Hellschreiber
10138.7 WSPR beacons
10139 JT65A
10140 QRSS Beacons
10140 PSK
10140-10150 RTTY
10147 MFSK16

14000 to 14350 kHz – 20 metres (“twenty”)
14000-14025 CW DX Window simplex or split, listen for op’s instructions (no local ragchewing)!
14040 IOTA CW
14060 CW QRP
14070-14073 PSK
14071-14075 Hellschreiber
14073 Hellschreiber DX calling frequency
14076 JT65A
14078-14080 Throb
14078-14082 MFSK16
14080-14090 RTTY
14090-14110 Packet, AMTOR, PACTOR
14095.6 WSPR beacons
140989 QRSS Beacons
14101 ROS
14103 ROS
14107.5 Olivia 32/100
14100 NCDXF International beacon Network (Do not transmit here)
14109-14111 MT63
14115-14350 SSB (14170-14220 DX Calling Simplex or split listen for op’s instructions)
14227 SSTV
14230 SSTV
14233 SSTV
14236 SSTV
14260 IOTA SSB
14285 SSB QRP
14286 AM
14346 ALE

18068 to 18168 kHz – 17 metres (“seventeen”)
18070-18080 CW DX Window simplex or split listen for op’s instructions (no local ragchewing)!
18090 IOTA CW
18100 PSK
18102 JT65A
18104-18107 Hellschreiber
18104.6 WSPR beacons
18105 MFSK16
181089 QRSS Beacons
18110 NCDXF International Beacon Network (Do not transmit here)
18117.5 ALE
18128 IOTA SSB
18120-18168 SSB

21000 to 21450 kHz – 15 metres (“fifteen”)
21000-21025 CW DX Window simplex or split listen for op’s instructions(no local ragchewing)!
21040 IOTA CW
21060 QRP CW
21063-21070 Hellschreiber
21070-21080 PSK
21074 Hellschreiber
21076 JT65A
21080 MFSK16
21080 RTTY DX
21080-21110 RTTY
21094.6 WSPR beacons
21100-21450 SSB
21150 NCDXF International Beacon Network (Do not transmit here)
21340-21430 SSTV
21385 QRP SSB
21260 IOTA SSB
21432.5 ALE

24890 to 24990 kHz – 12 metres (“twelve”)
24890-24910 CW DX Window simplex or split listen for op’s instructions (no local ragchewing)
24917 JT65A
24920-24925 PSK
24920-24930 RTTY
24924 Hellschreiber
24924.6 WSPR beacons
24930 NCDXF International Beacon Network (Do not transmit here)
24932 ALE
24935-24990 SSB
24950 IOTA SSB calling frequency

28000 to 29700 kHz – 10 metres (“ten”)
28000-28025 CW DX Window simplex or split listen for op’s instructions (no local ragchewing)
28060 QRP CW
28063-28070 Hellschreiber
28074 Hellschreiber
28076 JT65A
28080 RTTY DX
28080-28110 RTTY
28120 PSK
28124.6 WSPR beacons
28160-28300 Beacons (Do not transmit here)
28200 NCDXF International Beacon Network (Do not transmit here)
28312.5 ALE
28321 QRSS beacons
28385 QRP SSB
28350-28700 SSB
28460 IOTA SSB
28560 IOTA SSB
28675-28685 SSTV
28885 Six metre liaison frequency
29000-29200 AM
29300-29510 Satellite downlinks (Do not transmit here)
29520-29580 FM repeater inputs (duplex, listen 100 kHz higher)
28590-28610 FM simplex
29600 FM simplex calling frequency
29620-29680 FM repeater outputs (duplex, transmit 100 kHz lower)

Notes
This list is not definitive.
Check your transmitting license for the explicit terms and conditions according to the New Zealand law.
All frequencies are dial settings in kiloHertz.
In order to prevent your transmissions extending out of band, do not transmit right at the band edges.
Keep your power, microphone gain and speech processing down to reduce spurious transmissions and overmodulation, especially on digimodes.
Stay clear of the beacon and satellite downlink frequencies to avoid interfering with reception of very weak signals.
On SSB, use LSB on 40m and lower frequency bands, or USB on 20m and up.
Most digimodes use USB on all bands. If you cannot decode a good signal, try LSB or ‘invert’, assuming you are using the appropriate digimode and speed!
Some of the frequencies shown are not available to amateurs in other countries, who may therefore be found elsewhere. In particular, novices often have restrictions on the bands, frequency-ranges and transmit power.
CW is permitted across the entirety of each band, but is usually found in the segments indicated.
DXpeditions and rare DX stations usually operate “split” (half-duplex): listen to the DX operator’s instructions or tune around to find other callers. Avoid calling on the DX station’s transmit frequency (simplex) unless you are sure he is taking callers there.
All frequencies except band edges are approximate. Always listen carefully for a clear frequency before transmitting (including when operating split).
The 30m, 17m and 12m bands have been known as “the WARC bands” since they were initially allocated at a World Amateur Radio Conference.
Some bands (such as 80 & 30 metres) are shared with other radio services: do not interfere with them. They may have primary rights.
Please report pirates and intruders to the IARU Monitoring Service (see http://www.nzart.org.nz/nzart/monitoring-service/)

Operating modes
Morse code: CW
Voice modes: SSB, FM, AM and digital speech
Digimodes: JT65A, MT63, PSK, MFSK, Throb, RTTY, Packet, AMTOR, PACTOR, Clover, OLIVIA, DominoEX, ALE, CMSK, Piccolo and others
Raster-scanning modes: Hellschreiber, SSTV
ALE (in USB mode): MIL-STD 188-141 ; FED-1045 (8FSK – 2kHz Bandwidth)

Glossary
AM Amplitude Modulation
AMTOR Amateur Telex Over Radio
CMSK Correlated, Convolved, Chat-mode MSK (see http://www.qsl.net/zl1bpu/CMSK/cmsk.htm)
CW Continuous Wave
Digimodes Digital data modes
Duplex Transmit on one frequency while simultaneously receiving on another
FM Frequency Modulation
Half-duplex, split Transmit on one frequency, then receive on another
IOTA Islands On The Air
ITU International Telecommunications Union
LSB Lower Sideband
MSK Multi-Shift Keying
NCDXF Northern California DX Foundation (see http://www.ncdxf.org/pages/beacons.html)
Packet Packet radio (TCP/IP)
PACTOR Packet Telex Over Radio (100 baud increasing to 200 baud on good links)
PSK Phase Shift Keying (mostly 31 baud i.e. PSK31, with some activity on PSK63, PSK125 and occasionally other variants)
QRP Low transmit power (up to 5 watts output)
QRSS Very slow speed CW (takes seconds to send each element)
RTTY Radio Teletype (usually 170 Hz shift and 50 baud, sometimes 75 baud)
Simplex Transmit and receive on the same frequency
SSB Single Sideband
SSTV Slow-scan Television
USB Upper Sideband
WSPR Weak Signal Propagation Reporter beacon use MEPT_JT mode, similar to JT65A (see http://WSPRnet.org)

Design & Print Your Own QSLs

Love the DXing. Hate the QSLing! 

Most of us treat QSLing as a necessary evil when looking for awards. Even casual operating will result in a flood of QSLs arriving at the bureau. The problem is that QSLing becomes very expensive if you do a lot of operating. It’s not just the horrendous cost of postage, but the cost of having them professionally printed has risen considerably over the past few years. The ARRL’s “Logbook of the World” (LoW) becoming active has reduced costs enormously. The Internet e-QSL system works well but is not acceptable for most of the top awards. Writing individual QSLs by hand is time consuming and laborious in the extreme. There is a better way!

Electronic Log books such as DXLog, WriteLog, DX4Win and others have the facility to print labels. The programs can be adjusted to print any number of labels per page or one label per page and in fact print directly onto the QSL card. Most inkjet printers and laserjet printers will accept and print 90mm x 140mm cards fed into the printer end on as long as the card used is not too thick. Standard QSL stock is 225 grams. Small printers will have a problem with the 225 gram thickness but will process the thinner 140 gram stock quite nicely.

Ten years ago graphics programs were the domain of the professional printing houses. Now you can buy Corel Draw 7.0 or Microsoft Publisher 2000 and other graphics programs relatively cheaply to design your own QSL cards. In fact you can now have complete control over the design, manufacture and processing of your own cards. The ZL2AS QSL card below is a simple one I designed for handwritten information.ZL2AS LH

There are specific QSL design programs available. They did not suit what I wanted to do as most of them had quite a few formats but wouldn’t allow me to have the “blank space” where I wanted it. Their designs where based on filling out a QSL with pen and ink. I don’t do pen and ink these days! Have a look at these websites below.

http://hamradiosoftware.com/HAM/qsldes.html or
http://www.rsars.org.uk/QSLDIY.HTM or
http://www.df3cb.com/bv/bvfeatures.html or
http://www.sm7tog.com/download.html (for icons)

I use Microsoft Publisher working with Windows XP to design the QSL. You could also use MS Word although the Microsoft way of doing graphics in Word is a bit unusual and unwieldy. You don’t have to be a graphics designer because QSL cards are not difficult to lay out and you may have thousands of examples in your collection that you can mine for ideas. If you don’t feel confident in designing it yourself, there are lots people around who dabble in Photoshop and other graphics programs and can do it easily. It is a simple matter to pirate the best of the designs and adapt them your needs. The text boxes and various elements of your design are easily moved around the screen.

As you do the design on your card the Microsoft Publisher program will set up four identical QSLs on an A4 page. Other graphics programs will handle it in a different way. You will notice in the ZM4T QSL below that the centre area is left clear for the program to print the QSO information from the logging program. The key is deciding where to put your reference point on the card. My reference point all my designs is 3mm to the right of the G in the word “Confirming” and level with the word. (See the ZM4T) QSL below. Once you have that point then you can set the label parameters in DX4Win Print|Edit window. The cards go into the tray end on side to print UP and the Logo/Name on the right side of the card first.ZM4T_QSL_764When your design is completed it is a simple matter to print off a few A4 pages, cut them into QSLs with scissors and check the Logging Program registration of the printing of the QSO information on your printer. Because I do a lot of QSLing, I have invested in a good quality guillotine and it’s now very easy to chop up a few hundred QSLs from the A4 pages by setting the dimensions to standard QSL size of  90mm x 140mm.

See the ZL2AJ design below. When the four QSL template page is finalized, go into any good stationery supplier and ask for Kaskad A4, 140 gram paper in packs of 250 with your choice of colour. 140Gm is perfect as it will go through most inkjet and laserjet printers if you want to print them yourself. All colours of the rainbow are available. Or you can head off to your local photocopy house to have them photocopied and cut exactly to size. 250 sheets will make 1000 QSL cards.ZL2AJ QSL4

The cost varies from 4 to 8 cents per sheet for first class laser copying. I am sure that a better price could be found by shopping around. The cost of cutting to size is about $5.00 per pack of 250 sheets. The cost of the Kaskad sheets is around $25.00 per 250 sheets. The total cost works out to around $40 – $75 per 1000 QSLs depending on how much of the process you do yourself. You could even print your QSLs on plain A4 white paper. The cost would be around $7.00 for 2000 QSLs. They would be thin but would satisfy the requirements for a QSL.

I have used DX4Win Logging program since the early 1990s and am up to version 8.05 It gives me full control of where the information prints on the card and mine is set up to print up to 5 QSOs per card

The finished ZM4T QSL with the QSO information is shown above. I use white card and print it on my cheap Brother printer. You will note that the DX4WIN logging program fills in the QSO information in the correct place on the card. This card shows four QSOs for XR0X and the logging program also inserts a few lines at the bottom with the equipment info, the operator’s name and PSE or TNX QSL determined by the program. All the information is on one side of the card which makes life easier for QSL managers.

The ZL2AL QSL design below shows the front side graphics and the second is the back of the QSL. It was been printed commercially by UX5UO Print with a cartoon on the front ready for printing QSO information on the back. That same reference point is used for print registration. The cost saving of not having to purchase about 20,000 labels was considerable. I started out using a cheap Inkjet printer but soon found that a cheap Canon black and white only laser printer with a toner cartridge was much more economical to run as the printing on the back of the card was minimal.

The front side of the UX5UO printed card. The cartoon graphic was created by a company in the USA to add a little humour to sometimes humourless QSLs.

The front side of the UX5UO printed card. The cartoon graphic was created by a company in the USA to add a little humour to sometimes humourless QSLs.

Latest ZL2AL design using a very old MS Publisher graphics program. This is the back of the card. Front is not shown.

Latest ZL2AL design using a very old MS Publisher graphics program. This is the back of the card. Front is  shown above.

n

The ZL7T Design is shown below. We made about 3,000 of them.

The ZL7T design works very well and is printed with an Inkjet and QSL info with the Canon Laserjet.

The ZL7T design works very well and is printed with an Inkjet and QSL info with the Canon Laserjet.

You could even print directly from your printer and cut the QSLs yourself if you only want small runs and want to reduce the cost even further. The cost of a printer ink cartridge must be taken into consideration. Cartridges are expensive buying from your local NZ supplier. I used an old Brother 130C multi function printer for a few years but it was expensive to run. I discovered that I can order 4 sets of cartridges (made in China and I will happily void warranty!!!) for $70 NZD delivered purchased on eBay.

I have a specifically dedicated Canon BP3120 Laser B/W only printer that I use for feeding the 90 x 140mm cards end ways from the bottom tray to print the black ink QSO information on. I can print thousands of QSL cards with one cartridge. A new printer is cheap at around $70 or so. I also use a QSL Manager program called Hamcall by Buckmaster which can be set up to print directly onto C6 size envelopes. The Hamcall CD is a database of 1.3 million names and callsigns. Addresses and call letters are updated monthly from their website. After I have printed ten or fifteen “QSL Direct” cards, I can call up the names and addresses from the Hamcall CD and print the envelopes. I also use Hamcall to print my own “return” C6 envelopes with my name on them. No labels are involved – Ever!

I also have a small sheet of paper about the size of the QSL card to enclose with the QSL which tells the other recipient a little about myself, my family and the area I live in. I am quite amazed at the number of letters I get in response to the info sheet telling me about their history and their families. It’s much more interesting when you know a little more about who you were talking to other than just name, rank and serial number! Typically I can receive 50 cards or more from the QSL bureau and process them in 15 or 20 minutes. And yes, there is a place on the card where I sign each one individually.

The system works very well for me and saves a lot of time, effort and money in the process of producing QSL cards. Please contact me at [email protected] if you don’t feel comfortable with designing a card. I would be happy to help set up a template for you and then you can simply have it copied for inexpensive QSLing.

73 de Lee ZL2AL

Good Operator’s Guide

Good Operators Guide by Riley Hollingsworth FCC

The following hints are a starting point for being a good operator. They have been put together from various statements made by Riley Holingsworth of the FCC during many different presentations he has made.

Please think about them.

You don’t “own” or get preference to use any frequency.

Realize that every right carries responsibilities, and just because you may have a right to do certain things doesn’t mean it’s right to do them in every circumstance.

Give a little ground–even if you have a right not to–in order to help preserve Amateur Radio and not cause it to get a bad name or hasten the day when it becomes obsolete.

Respect band plans, because they make it possible for every mode to have a chance.

Be aware that we all love Amateur Radio, and there’s no need to damage or disgrace it just to save face.

Cut a net or a contester a break, even if you don’t have to and even if you have no interest whatsoever in nets or contesting.

Don’t operate so that whoever hears you becomes sorry they ever got into (or tuned in on) Amateur Radio in the first place.

Keep personal conflicts off the air. Settle your arguments on the telephone, the Internet or in person. Just keep them off the air.

HF Amplifiers versus Antennas by NT0Z

One Ham’s Opinion By Kirk A. Kleinschmidt, NT0Z

Think you need a shiny new linear amplifier to chase away your HF radio blues? Think again. What you probably need is a better antenna! Here’s why….

Let’s start by eliminating any thoughts of fairness and equality regarding this article’s handling of the age-old philosophical struggle between amplifiers and antennas. More than a few hams will take exception to my biased statements (common when trampling sacred cows and sneering at tradition), but if you’re a typical beginning ham, you’re probably wondering whether to buy an amplifier or improve your antenna system—or maybe both.
It’s a logical question. You want to improve your station’s signal quality, make more QSOs, work more DX stations, rack up higher contest scores and chat with others while enjoying armchair copy. You want to know whether amplifiers are a good investment, whether they’ll require additional equipment and services, whether they’ll provide the boost in readability you’ve been desiring and so on.

By now you’re thinking that I’m an “antenna guy,” and that I’m here—through this article—to persuade you to improve your antenna system. You’re right! But beyond the many nuts and bolts reasons detailed herein, I’d like you to at least consider a few philosophical reasons to keep your power output at barefoot levels (or less!). Then, if you’re not convinced, we’ll take a look at the cold, hard facts about amplifiers and antennas. Amateur Radio’s Middle Path Amateur Radio operation in the US is constituted as a radio service, with rules, regulations and goals that go beyond the interest of mere hobby operation. In becoming licensed hams, we agreed to play by those rules.

One of the most important rules compels us to use the minimum transmitter power required to communicate. That doesn’t rule out the use of linear amplifiers, of course, but it does put a damper on their indiscriminate or habitual use. Powering your amplifier through your shack’s light switch certainly violates the rule, as does running maximum legal output power when chatting with the gang across town (or when propagation clearly doesn’t require it). The minimum necessary power rule is designed to protect us all. It promotes responsible, considerate operation. Try it sometime! Reduce your 100-W signal to 50 or 25 W. Thanks to years of low-power operating, I know that you’ll maintain effective communication most of the time. You’ll also improve your operating skills, enjoy a greater sense of achievement and gain an intuitive sense of propagation. By the way, the FCC’s minimum necessary power rule isn’t suspended for contest operation, to work DXpeditions, etc. About the only open-and-shut case for the automatic use of maximum available power is for emergency communications. When someone’s life is on the line, the more power the better. That kind of service is what the Amateur Radio Service is all about.

Skill Versus Brute Force
Long before David and Goliath had their epic battle, skill has been tangling with brute force. I’m sure you have your favourite analogy. Basically, it comes down to the fact that any idiot can fire up a water-cooled Voice of America-size transmitter and blurt out a whopping signal. I place hams who take this approach in the same category as the guys who screech the tires on their 1-ton pickups or water their lawns during drought emergencies. Both are equally impressive, I’m sure. On the other hand, if you align yourself with the Davids of the world, substituting skill and persistence for brute force, you’ll be in better company—and you’ll be upholding the tenets of the Amateur Radio Service. The Golden Rule Hams treading the Middle Path are concerned about others—hams, neighbors, family members, etc. They try to fit in, to get along, to accommodate a community of interests in addition to their own. They practice the Golden Rule Do unto others as you would have them do unto you (reasonable variations notwithstanding). As hams who comprise a federally licensed emergency service, we enjoy certain protections from unreasonable local restriction.

These privileges are welcome and necessary as a whole, but they can be easily abused. Just because we can transmit a 1500-W signal doesn’t mean we should. Just because we can erect a 200-foot-high antenna tower doesn’t mean we should. Hams who follow the Golden Rule integrate their radio pursuits with the pursuits of others—not because they have to, but because they want to! Governments can’t legislate common sense. That’s up to us. Okay, that’s the end of my emotional pitch for restraint. If you’re still tempted to reach for the power switch (the high power switch) or dig into your rainy day fund to purchase an amplifier, let’s look at the facts.

The Ham Next Door
To start, let’s assume that you have a typical shack. A 100-W transceiver graces your operating desk and “talks” to a coax-fed dipole (or two) through a 300-W antenna tuner. Thanks to the tuner, your rig can happily put out full power regardless of actual antenna/feed line SWRs on the various bands you work. You use the same setup as your “Elmer” and most of the guys in the local radio club. Uncounted thousands of hams have used similar setups over the years, so they must work pretty well, right? Maybe. But maybe not. In fact, you might have noticed that working stations on some bands doesn’t seem as easy as it should—especially DX stations. You might even be dreaming of solving your problem by cranking up the power. By adding a gleaming, glowing monster amp to your modest shack, you might think, those stations with once-marginal copy will respond with ease. It’s a comforting image, but it’s probably more fantasy than reality. Although you may not yet know it, you’ll likely get a lot more signal for a lot less money if you upgrade your antenna system before shelling out the bucks for an amplifier.

The Price of Power
Let’s boost our signal a step or two at a time and see how the decibels stack up against the greenbacks. If your amplifier budget is modest, a small solid-state or single-tube amplifier will boost your 100-W barefoot signal to about 500 W. That’s enough to be noticed, or so you think—but just how noticeable? Here’s the law every amplifier has to measure up to Every time you double your power output, stations that are receiving your
signal hear a 3-dB increase in strength. That’s half an S unit! To twitch the needle a full S unit you need to quadruple your power output (a 6-dB increase)! The power output progression looks like this 100 W doubled to 200 W equals a 3-dB increase. Next, 200 W doubled to 400 Wequals a 6-dB increase. Then, 400 W doubled to 800 W equals a 9-dB increase (exceeding the output power of our entry-level amplifier). Finally, 100 W times 10 equals 1000 W, a 10-dB increase in power output. Our 500-W output amplifier gives us a smidgen more than a one S-unit boost on the other end (see Figure 1). That’s not much especially when you consider the cost.

Figure 1
Fig1Spend a wad of cash on an RF power amplifier and what do you get? Let’s assume that we have an average conversation in progress on a quiet band. Your current 100-W signal pushes an S meter on the receiving end to S5. Increase your output to 500 W and the other guy’s meter might slide up to a tad more than S6—a change he won’t even notice. Turn on the 1000-W afterburner and you’ll make his meter twitch almost to S7. Oh boy! Yes, he’ll probably notice a difference now, but he heard you well enough at S5, didn’t he?

More Power
So, you want to run even more power? Using our calculations from before, boosting your signal to a kilowatt output provides a 10-dB shot in the arm. That’s just under two S units on the other end—S3 to S5, S7 to S9, etc. That’s enough of a difference to be noticed, but still not enough to “burn down the barn.” And by the way, the most affordable kilowatt amplifiers cost about $1500. If you really go for the gusto and buy a legal-limit amplifier, your 1500-W signal will be about 12 dB stronger than your “barefoot” transceiver. Because of the “price of power,” 1500 W is still only two S units stronger! And a legal-limit amplifier is hardly a casual purchase. It’ll set your wallet back about $2500.

Hidden Costs
Don’t think you can get away with just an amplifier! The power output curve is often deceptive. For example, above 300 W output or so, you’ll need a beefier antenna tuner. Expect to spend up to $500 for a good one. And don’t forget about the ac mains, either. You can probably get away with running a 500-W output amplifier on 120 V ac, but beyond that, it’s 240 V all the way. (Don’t believe me? A 500-W output amplifier runs 1000 W input power. That’s 4.5A at 240 V. With your rig added in, that’s more than 10 A. Believe me, the lights in your house will “jump” to the rhythm of your code key or your spoken words!) Chances are good that you won’t know how (or won’t want) install that 240V line yourself, either. The materials and an electrician to install them likely will total $300 to $500. Many first-time amplifier users don’t consider their beast’s power supply requirements until they’ve set up the amp and started “browning out” the rest of their house! If this is you, you’ll be lucky if you don’t trash your TV set or your home computer in the process of “modulating” your 120-V power feed! If you live in an urban setting, don’t neglect the potential “public relations” costs of firing up a killer signal in the midst of all those consumer electronics devices. I know…you can legally stand on the solid rock of FCC-mandated power output limits—but be warned that it can be a lonely vigil.

A Better Way?
To save wear and tear on your neighbours  fellow hams, your wallet and even your house wiring, consider improving your antenna system before investing in an amplifier. Here are some ideas to get you started One almost universal way to get out more signal is to get your antenna(s) farther up in the air (your present antenna or a new one). Build a taller mast, find a taller tree or put up a tower. If that dipole just isn’t cutting it, put up a contest-winning and DX-catching secret weapon a full-wave horizontal loop for 40 or 80 meters (up as high as possible, of course!). Feed it with coax and use a tuner on bands above the fundamental frequency. That’s a “cheap ‘n’ dirty” way to snag an extra 2 to 10 dB, depending on frequency.

Disconnect the feed line from your coax-fed single-band dipole, the one you try to use on several bands, and replace with 450 ohm ?ladder line (Figure 2). With a coax feed, even though your antenna tuner may be presenting a happy impedance to your transmitter, feed line losses due to high SWR may slash your signal by 6, 10 or 25 dB, depending on the band and the size of your dipole! By using 450-??open-wire line you’ll likely reclaim most of that lost power. Now that’s a 6 to 20-dB shot in the arm that anyone can afford!

Figure 2
You can increase the performance of a simple dipole by using low-loss open-wire 450 ohm windowed feed line.Fig2

This is one of the easiest, inexpensive antennas for the HF beginner. Just string up a dipole made of two equal lengths of copper wire. Don’t worry about the overall length; just make it as long as you can. Connect the feed line to the center insulator and run it back to an antenna tuner with a balanced output. Attach coax between the tuner and the radio and you’re in business on several bands! For less than the price of an entry-level amplifier you can buy a multiband beam antenna and a decent rotator. This dynamic duo, mounted reasonably high, will offer a 5 to 7-dB steerable improvement to your signal. Remember Amplifiers only boost your transmitted signal and do nothing to improve reception. By rotating a directional antenna you can often achieve a double whammy, boosting the signal you’re trying to receive while attenuating signals that are unwanted. For example, if I’m working a European ham from my Minnesota QTH, a potentially interfering signal from an op in Florida—located in the side null of my directional antenna—may drop 25 dB or more! The difference, more than 30 dB of signal enhancement, could never be achieved by a lone amplifier. On SSB, learn the correct use of your rig’s speech processor. There’s another 3 dB (or more) improvement, this time in the modulation department! No purchase necessary!

Aftermath
So, after looking at the cold, hard facts, do antennas win out over amplifiers at your shack? Or will your operating table soon be sporting some heavy iron? As always, the choice is yours. Amplifiers do have their uses especially after you’ve tweaked your antenna farm. Add a 10-dB amplifier to a 7-dB beam antenna and you’ve got a whopping 17-dB improvement in signal strength! That will put you on the map—especially when the
minimum necessary power required to communicate calls for maximum smoke. And when conditions are poor an amp may make the difference between being heard and being lost in the noise. As long as it’s confession time, let me come clean…. Most of my operating over the past 23 years has been at QRP or barefoot power levels, but I’ve used an amplifier every now and then. The first was one that I built myself from scavenged parts. I was seduced by the possibility of a glowing 4-400A transmitting tube, and I was trying to work DX on 80 meters with a poor antenna. The amplifier helped me put a few difficult QSOs in the log, but collateral considerations forced me to abandon my glowing metal and glass monstrosity. The 150-pound amp was collapsing my operating desk, and its draw from the 230-V mains was overwhelming! I could only use it in the wee hours when everyone else was in bed…. After I put up a decent 80-meter antenna, I never looked back. Given the choice, I’ll take a “killer” antenna instead of a “rock crusher” any day! How about you?

S Meters and Radio Lore
Something needs to be said about S meters: With a few exceptions, they’re inaccurate, non linear and of dubious calibration! Each S unit on a typical S meter is supposed to indicate a 6 dB increase in the strength of a received signal. But it probably doesn’t  Or it might at one frequency on one band (or a few frequencies on a few bands). On other frequencies and modes, however, it might provide readings that are way out in left field. S meters appeal to our senses and to our need to categorize and stratify things in our environment. They can be useful, but we shouldn’t rely on them for precise measurements. That’s what your brain is for. Use it and forget the bouncing needle!

When Less is More
Now that you’ve seen that it takes a whopping amount of extra power to make a noticeable difference in received signal strength, you might be wondering whether the cold equations work in the other direction—and they do!
If you have an okay signal with 100 W, you’ll likely have a workable signal with 25 W, or even 5 W. That’s the Holy Grail of QRP (low power) operation. The power output numbers work, just like before, in reverse.

Let’s say that you have an S9 signal with 100 W output. Cutting your power to 50 W provides a 3-dB decrease in strength. Cutting power to 25 W adds another 3-dB reduction. Therefore, going from 100 W output to 25 W output has reduced your received signal strength by 6 dB—only 1 S unit! By drastically cutting your power output, your signal has dropped from S9 to S8! That’s not a big deal! Dropping from 100 W to 10 W is a 10-dB reduction—less than 2 S units. Dropping to 5 W, the commonly accepted threshold for QRP operation, totals 13 dB—just a smidgen more than 2 S units. Your signal will go from S9 to about S7! Again, not a big deal! Add a decent directional gain antenna to the QRP equation and you’re back in the old ballpark—while running a lot less power. That’s QRP. And it’s a lot of fun.
NT0Z

Ideas For Radio Clubs

Is Your Ham Radio Club a General Purpose or Specialty Club by Scot, K9JY?

Ham radio clubs are often thought of as the bedrock of amateur radio. As one who has both criticized ham radio clubs as well as made suggestions for helping improve them, I want to take some time to talk through what makes a great ham radio club.
The very first decision that needs making when forming a club is this one: do you want your club to be a general purpose club or a specialty club?

Some definitions

General purpose radio clubs are those clubs that want ham radio operators from the many different subsections of the overall hobby. You want to attract DX’ers, contesters, VHF enthusiasts, rag chewers, digital enthusiasts, builders, CW operators, SSTV types and people who love to work satellites and bounce signals off the Moon. QRP and QRO. Public service and emergency communications.

Specialty clubs, on the other hand, want to focus on one specific area of the hobby. The DX club. The contesting club. The repeater club. The digital club.
The very first thing you need to do is decide what type of club you want to be. These different types of clubs are managed differently, promote themselves differently and approach club membership differently.
If you are not in a large enough area to support specialty clubs, you may by default need to be a general purpose radio club so that ten people can get together as a club. That’s just fine, but you need to then manage the club as a general purpose club and not a specialty club that happens to have three other people in it.
And for established clubs, you need to periodically take a hard look at what type of club you actually are and not what your mission statement says you are. Is your entire club now consisting of DX’ers and Contesting? Maybe you should split in two – or focus on getting other hams with more diverse interests involved in your club.
Your club can be a general purpose club or a specialty club, but not both.

Radio Club Program Ideas
• Have a guest speaker. Topics can include ARES, Skywarn, antennas, radio history etc.
• Show a video.
• Show a Power Point.
• Have an auction. Club members can bring items, with a portion of proceeds going to the club.
• Go on a field trip. Visit local radio or TV stations, electronics firms or police communications center.
• Radio trivia game. Ask questions relating to radio, with prizes for most correct answers.
• Show and Tell. Members bring items and describe them.
• Homebrew night. Members bring a radio construction project and describe it.
• QSL night. Cards are shown and stories told relating to the contacts.
• Technology updates. Details of new modes (digital, APRS) and circuits.
• Equipment reviews. Owners of new ham equipment describe and evaluate it.

Scott K9AY

Comparing Radios

Apples and Oranges by Fred KI6YN…

I read the letters and complaints about the current crop of transceivers. As an electronics engineer that designs satellite ground stations, I have at least a modicum of understanding of what it takes to make a good rig. Most of the comments I read show complete ignorance about basic economics and electronics. The bottom line is that ‘you get what you pay for’, there are darn few exceptions to that.

I am an amateur astronomer as well as a ham. I’ve found that most amateur astronomers are like most hams; they can cite chapter and verse from advertisements and nonsense they’ve heard from others in the hobby. Instead of investigating and studying, they take the word of others. It seems that this is true in most hobbies. When I first became a ham in 1988, the big push was phase locked loops and phase noise. I was amazed at the nonsense I read and especially the way the specs were quoted in the ads. Only Ten-Tec made sense in that they exclaimed exactly the way they made their measurements and gave realistic baselines. The antenna manufacturers were nothing but con artists with their ads, very little has changed!

I recently bought a Ten Tec Orion; it is a great radio for any price compared to what is on the market. I’ve seen it compared to the K2, another terrific rig…. but they are not even close in design and specifications. Let’s get real, when you get near the top of the performance curves, every little bit cost a lot more than the gain in the middle or bottom of the curve. I wouldn’t want to take the Orion out in the field but wouldn’t hesitate to take a K2. One of the best rigs I’ve ever had was an old Delta 580, and I am still sorry that I sold it. My Icom 761 was a rock solid rig for ten years. It is true that quality control has become an issue in all countries, not just Asia. I had a 756 PRO and was quite disappointed with its performance.

My Omni 6 Plus was a superior rig in all ways but sure didn’t look like much next to the Pro with the pan display and ten thousand knobs, switches and whatever. Of course, the Omni was easier to operate and being direct injection and ham band only, a much quieter rig than the Pro. Remember, the narrower the bandwidth of the front-end, the lower the noise is going to be; general coverage usually implies a large bandwidth for each segment. The tuning knob on the Omni turned like an old pig and the one on the Pro was smooth and well balanced, but the real object was sweet sounding CW both in and out and the Omni won hands down.

So, purchase a big fancy box and impress your friends with your possessions that you purchased and had nothing to do with in the design or stick with the object of the hobby, get a rig that performs both receiving and transmitting well. That is what the hobby is all about. I might mention that I also have a Yaesu FT-847, a great rig for mobile and can do it all. It certainly can’t compete with the Orion at the base station level, but then again, the Orion wouldn’t be very good for mobile and doesn’t have UHF or VHF; the 847 costs about a third of what the Orion costs. See what I mean about Apples and Oranges.
Make a list of those features that are important to you and prioritize it. If the new rigs are too expensive for your budget, the look at some used stuff. There are a lot of classic rigs out there that are quite reasonable. Stop buying based upon advertisements and appearance of the radios and the manufacturers will clean up their own act.

Fred Martin – KI6YN

ZL Bands and Modes Useage

Amateur Radio HF Band Usage in New Zealand (160 through 10 metre bands)
Prepared by ZL3AB – January 2013
==========================================

1800 to 1950 kHz – 160 metres (“topband” or “one-sixty”)
——————————————————–
1800-1810 Digimodes
1810-1850 CW
1810 CW QRP
1836.6 WSPR beacons
1838 JT65A
1840-1843 Digimodes
1843-1950 SSB
1910 SSB QRP

3500 to 3900 kHz – 80 metres (“eighty” or “seventy five”)
———————————————————
3500-3525 CW DX Window simplex or split, listen for op’s instructions (no local ragchewing)!
3530 IOTA CW
3559 Hellschreiber (Region 3)
3560 QRP CW
3570 BPSK31
3575 Hellschreiber
3576 JT65A
3579 QRSS Beacons
3580 RTTY
3590 RTTY DX
3592.6 WSPR beacons
3600-3900 SSB
3620-3640 VK/ZL digimodes window
3710 QRP CW
3730-3740 SSTV (ITU Region 1)
3755 IOTA SSB
3776-3800 SSB DX window for intercontinental traffic
3791 ALE
3845 SSTV (ITU Region 2)
3885 AM

5060-5428kHz – 60 metres (“five megs”)
————————————————-
ZLs are not currently permitted to use 60 metres except for legitimate
emergency communications purposes on either 5320 or 5395 kHz.

7000 to 7300 kHz – 40 metres (“forty”)
————————————–
7000-7025 CW DX Window simplex or split, listen for op’s instructions (no local ragchewing)!
7030 IOTA CW
7030-7040 Hellschreiber
7035-7040 BPSK31 (ITU Regions 1 & 3)
7035-7045 RTTY (ITU Regions 1 & 3)
7039 JT65A
7039 Hellschreiber
7040 RTTY DX
7040 QRP (ITU Region 2)
70599 QRSS Beacons
7070-7075 BPSK31 (ITU Region 2)
7076 JT65A (USB)
7080 RTTY (ITURegion 2)
7083.6 WSPR beacons
7084 Hellschreiber (USB Region 1)
7075-7.100 SSB Calling Simplex or split listen for op’s instructions
7100-7.200 SSB (Region 1)
7125-7.300 SSB (Region 2)
7171 SSTV
7185.5 ALE
7285 QRP SSB
7290 AM

10100 to 10150 kHz – 30 metres (“thirty”)
—————————————–
10100-10110 CW DX Window simplex or split listen for op’s instructions (no local ragchewing)!
10115 IOTA CW
10116 QRP CW
10135-10145 Hellschreiber
10138.7 WSPR beacons
10139 JT65A
10140 QRSS Beacons
10140 PSK
10140-10150 RTTY
10147 MFSK16

14000 to 14350 kHz – 20 metres (“twenty”)
—————————————–
14000-14025 CW DX Window simplex or split, listen for op’s instructions (no local ragchewing)!
14040 IOTA CW
14060 CW QRP
14070-14073 PSK
14071-14075 Hellschreiber
14073 Hellschreiber DX calling frequency
14076 JT65A
14078-14080 Throb
14078-14082 MFSK16
14080-14090 RTTY
14090-14110 Packet, AMTOR, PACTOR
14095.6 WSPR beacons
140989 QRSS Beacons
14101 ROS
14103 ROS
14107.5 Olivia 32/100
14100 NCDXF International beacon Network (Do not transmit here)
14109-14111 MT63
14115-14350 SSB (14170-14220 DX Calling Simplex or split listen for op’s instructions)
14227 SSTV
14230 SSTV
14233 SSTV
14236 SSTV
14260 IOTA SSB
14285 SSB QRP
14286 AM
14346 ALE

18068 to 18168 kHz – 17 metres (“seventeen”)
——————————————–
18070-18080 CW DX Window simplex or split listen for op’s instructions (no local ragchewing)!
18090 IOTA CW
18100 PSK
18102 JT65A
18104-18107 Hellschreiber
18104.6 WSPR beacons
18105 MFSK16
181089 QRSS Beacons
18110 NCDXF International Beacon Network (Do not transmit here)
18117.5 ALE
18128 IOTA SSB
18120-18168 SSB

21000 to 21450 kHz – 15 metres (“fifteen”)
——————————————
21000-21025 CW DX Window simplex or split listen for op’s instructions(no local ragchewing)!
21040 IOTA CW
21060 QRP CW
21063-21070 Hellschreiber
21070-21080 PSK
21074 Hellschreiber
21076 JT65A
21080 MFSK16
21080 RTTY DX
21080-21110 RTTY
21094.6 WSPR beacons
21100-21450 SSB
21150 NCDXF International Beacon Network (Do not transmit here)
21340-21430 SSTV
21385 QRP SSB
21260 IOTA SSB
21432.5 ALE

24890 to 24990 kHz – 12 metres (“twelve”)
—————————————–
24890-24910 CW DX Window simplex or split listen for op’s instructions
24917 JT65A
24920-24925 PSK
24920-24930 RTTY
24924 Hellschreiber
24924.6 WSPR beacons
24930 NCDXF International Beacon Network (Do not transmit here)
24932 ALE
24935-24990 SSB
24950 IOTA SSB calling frequency

28000 to 29700 kHz – 10 metres (“ten”)
————————————–
28000-28025 CW DX Window simplex or split listen for op’s instructions
28060 QRP CW
28063-28070 Hellschreiber
28074 Hellschreiber
28076 JT65A
28080 RTTY DX
28080-28110 RTTY
28120 PSK
28124.6 WSPR beacons
28160-28300 Beacons (Do not transmit here)
28200 NCDXF International Beacon Network (Do not transmit here)
28312.5 ALE
28321 QRSS beacons
28385 QRP SSB
28350-28700 SSB
28460 IOTA SSB
28560 IOTA SSB
28675-28685 SSTV
28885 Six metre liaison frequency
29000-29200 AM
29300-29510 Satellite downlinks (Do not transmit here)
29520-29580 FM repeater inputs (duplex, listen 100 kHz higher)
28590-28610 FM simplex
29600 FM simplex calling frequency
29620-29680 FM repeater outputs (duplex, transmit 100 kHz lower)

Notes
—–
This list is not definitive. Check your transmitting license for the explicit terms
and conditions according to the New Zealand law.
All frequencies are dial settings in kiloHertz.
In order to prevent your transmissions extending out of band, do not transmit
right on the band edges.
Keep your power, microphone gain and speech processing down to reduce spurious
transmissions and overmodulation, especially on digimodes.
Stay clear of the beacon and satellite downlink frequencies to avoid interfering with
reception of very weak signals.
On SSB, use LSB on 40m and lower frequency bands, or USB on 30m and up.
Most digimodes use USB on all bands. If you cannot decode a good signal, try LSB or ‘invert’,
assuming you are using the appropriate digimode and speed!
New Zealand is in ITU Region 3 but ZL amateurs are also allowed to use digimodes on the
frequencies allocated to ITU Region 2 (the Americas).
Some of the frequencies shown are not available to amateurs in other countries,
who may therefore be found elsewhere. In particular, novices often have restrictions on the bands, frequency-ranges and transmit power.
CW is permitted across the entirety of each band, but is usually found in the segments indicated.
DXpeditions and rare DX stations usually operate “split” (half-duplex): listen to the DX operator’s instructions or tune around to find other callers. Avoid calling on the DX station’s transmit frequency (simplex) unless you are sure he is taking callers there.
All frequencies except band edges are approximate. Always listen carefully for a clear frequency before transmitting (including when operating split).
The 30m, 17m and 12m bands have been known as “the WARC bands” since they were initially
allocated at a World Amateur Radio Conference.
Some bands (such as 30 metres) are shared with other radio services: do not interfere with them.
They may have primary rights.
Please report pirates and intruders to the IARU Monitoring Service (see http://www.nzart.org.nz/nzart/monitoring-service/)

Operating modes
—————
Morse code: CW
Voice modes: SSB, FM, AM and digital speech
Digimodes: JT65A, MT63, PSK, MFSK, Throb, RTTY, Packet, AMTOR, PACTOR, Clover, OLIVIA, DominoEX, ALE, CMSK, Piccolo and others
Raster-scanning modes: Hellschreiber, SSTV
ALE (in USB mode): MIL-STD 188-141 ; FED-1045 (8FSK – 2kHz Bandwidth)

Glossary
——–
AM Amplitude Modulation
AMTOR Amateur Telex Over Radio
CMSK Correlated, Convolved, Chat-mode MSK (see http://www.qsl.net/zl1bpu/CMSK/cmsk.htm)
CW Continuous Wave
Digimodes Digital data modes
Duplex Transmit on one frequency while simultaneously receiving on another
FM Frequency Modulation
Half-duplex, split Transmit on one frequency, then receive on another
IOTA Islands On The Air
ITU International Telecommunications Union
LSB Lower Sideband
MSK Multi-Shift Keying
NCDXF Northern California DX Foundation (see http://www.ncdxf.org/pages/beacons.html)
Packet Packet radio (TCP/IP)
PACTOR Packet Telex Over Radio (100 baud increasing to 200 baud on good links)
PSK Phase Shift Keying (mostly 31 baud i.e. PSK31, with some activity on
PSK63, PSK125 and occasionally other variants)
QRP Low transmit power (up to 5 watts output)
QRSS Very slow speed CW (takes seconds to send each element)
RTTY Radio Teletype (usually 170 Hz shift and 50 baud, sometimes 75 baud)
Simplex Transmit and receive on the same frequency
SSB Single Sideband
SSTV Slow-scan Television
USB Upper Sideband
WSPR Weak Signal Propagation Reporter beacon use MEPT_JT mode,
similar to JT65A (see http://WSPRnet.org)

Last updated: January 2013

Choosing Your First Radio

Choosing Your First Radio by Chris Levin, KB7YOU October 8, 2006

1 Introduction

Ham radio is an exciting hobby – and there is a lot more to it than just talking on the radio.

Amateur radio provides a framework that supports a wide variety of interests. With amateur radio as a resource and guide you can experiment with digital communications and RF/Internet gateways, you can design and build electronic devices and talk to stations in outer space.

You can study propagation and atmospheric conditions or listen to interstellar signals created by the explosion of stars and much more.

Of course, communications is an important part of the amateur radio world. Meeting new people around town and around the world is tremendous fun.

Whatever your interests and goals, amateur radio can provide value to your endeavours.

The very versatility that makes ham radio so interesting can also cause problems. As a new ham or even as an experienced operator trying out a new aspect of the hobby, the huge amount of information available can be difficult to sort through. The Internet can be a valuable tool but with so many people giving conflicting advice, how do you know what’s right? That’s where this paper comes in. My goal is to give the new ham some basic, general information on radio types, their pros and cons and the ways that they can be used.

The information in these pages is based on my first hand experience. I don’t write about things I have no skill or experience with. By following these rules I can ensure good accuracy in the information I present.

I hope that you enjoy reading this document and that it helps you with your radio purchase. If you have questions, comments or corrections I would enjoy hearing from you.

2 Radio Types

2.1 Terms you need to know:

  • DC to Daylight – Refers to the new breed of radios that cover the HF (1.8MHz – 30MHz + 50MHz to 54MHz), VHF (144 MHz – 148 MHz) and UHF (420 MHz – 450 MHz) amateur bands. These are all mode radios and are available in a variety of form factors and feature sets.
  • All Mode – A term used to describe radios that support CW, SSB, AM, FM and various digital communication modes. Most modern HF radios and some VHF/UHF radios are all mode.
  • Dual Band – Generally refers to a radio that covers the 2 meter and 70 centimetre amateur bands.
  • HF – The 160 meter to 6 meter amateur bands.
  • VHF –The 2 meter amateur band.
  • UHF – The 70 centimeter amateur band.

Choosing a first radio is one of the most important decisions you will make – and one of the toughest. The right radio for you will depend on what you want to do now and in the future. It can be hard sorting through all the advice. To get you started I have listed each of the common radio types and some reasons to consider each.

2.2 Mobile 2 Meter and Dual Band Radios

The mobile 2m or dual band radio is the workhorse of local communications. These radios are most commonly used for communications via local repeaters and for short haul simplex communications. Most of these radios will also let you do PACKET or APRS communication with the addition of software and hardware. Some dual band mobile radios are also suitable for basic satellite communications. The majority of mobile radios are FM only and the most common bands they support are 2m and 70cm.

There are many radios available in this category. Prices range from under $200 for a basic 2m mobile up to $500 for models with built in PACKET modems and APRS software.

Things to consider:

  • If you live in an area with an active ham community chances are good that there is a lot of activity on the 2m and 70cm FM bands. One of these radios will give you lots of opportunities to communicate.
  • If you have a Technician license and plan on waiting a while to upgrade then your HF choices are very limited. A 2m, 70cm or dual band radio is an excellent choice for day to day communications.
  • If you are interested in PACKET or APRS then you need a 2m FM radio. A basic mobile rig or one of the more sophisticated rigs with a built-in PACKET modem is a must for these modes.
  • If you drive a lot or like to take road trips the mobile dual band radio is an excellent choice. In remote areas, the relatively high power output of these radios (usually 25 to 75 watts) will allow you to make contacts over distances of 20 to 50 miles.

Advantages:

  • High output power – These radios have power outputs ranging from a low of 20 watts up to 100 watts for some models.
  • Flexible – You can use these mobile radios in your car or your house (with the addition of a deep cycle battery and/or power supply). They also work with a wide variety of antennas allowing you to choose an antenna that suits your needs.
  • Feature rich – The larger form factor of these radios makes it simple for manufacturers to add extra features. The larger size also means that buttons and displays are larger and easier to use. You can purchase mobile radios with built in TNC’s (PACKET modems), cross band repeaters, general purpose scanners and other features.

Disadvantages:

  • Power requirements are higher than for handhelds. Most mobile radios are not going to be suitable for QRP or camping applications because of the large batteries required.
  • Limited modes and bands – These radios only work on the 2m and 70cm bands (some also cover 220MHz, 6m and 10m). Most of these radios only support FM communications.
  • External power supplies or batteries are needed for home use.

2.3 The DC to Daylight Radio

The “do it all” HF/6m/2m/70cm (and even higher!) radios are relatively new to the market. Often referred to as “shack in a box” radios they can be a great way to explore all of the common modes and bands available to the curious ham.

So why should you consider one of these radios? There are several reasons. First, they give you a little bit of everything – HF, 2m SSB, local repeaters and more. They are also great space savers if you don’t have room for multiple radios. If and when you decide to add a specialized radio to your setup or if you decide to buy a better performing “built to task” rig, your DC to Daylight radio will make a fine secondary rig. In many cases you can use it in conjunction with your other radio (especially if they are from the same manufacturer) to facilitate things like full duplex satellite operations. These radios will serve your needs as your license privileges grow and as your interests change.

Advantages:

  • Ready to go as you upgrade your license.
  • Space saving.
  • Many DC to Daylight rigs have rich feature sets and support things like satellite communications, packet cluster tuning and other digital modes and computer control.
  • Good features per dollar. These rigs give you a lot of “bang” for the buck.
  • Available in mobile and base station sizes and recently in portable/backpack sizes.

Disadvantages

  • Can be complex to operate with many menus and options.
  • Price premium over a similar quality HF only or VHF only all mode radio.
  • Generally they do not perform as well as dedicated built to task radios.

2.4 HF Base Station

The traditional 160 meter to 10 meter HF base station rig provides more features, more capable components and a larger form factor than mobile or portable rigs. Most HF base stations provide 100 watts of output power and many have built-in antenna tuners. There are a huge number of new and used rigs available in every price range.

With its larger form factor, the HF base station generally has a better receiver, more features, easier to use controls and will generally perform better than a similarly priced portable or mobile unit. Some HF base stations give you all mode capabilities on 6m and 2m in addition to their HF capabilities. Since there are so many HF base station radios to choose from you should spend some time on the ham radio web sites (eHam, ARRL, QSL.NET) reading reviews and examining features.

2.5 Handheld Radios

Handheld radios are nice, some are full of bells and whistles and many are less expensive than mobile or base radios. But I think you should consider a handheld as a second radio. Why? Modern handhelds are marvels but they have limited features, power and antennas. Yes you can add an amplifier and an external antenna but the amplifier + handheld will cost you as much as a mobile rig. Handhelds have limited frequency coverage and sensitivity. You are not going to get the most out of radio with just a handheld. If you absolutely must have one (I did!) then start with something simple while you save for one of the rigs described above. The ICOM Q7A is an excellent choice. Its $99, uses 2 AA batteries, puts out 300mW and does 2m and 70cm as well as having an excellent general coverage VHF/UHF scanner built in.

3 The KB7YOU Station Setup

I like to explore all aspects of amateur radio. I don’t have a favorite mode and I like to try out lots of different things from CW to meteor scatter to digital modes to portable operations while camping. Here is the equipment that I have collected over the last 2 years. It might give you an idea of what a typical but modest station looks like.

  • Antennas – I have several permanent antennas and I’m always experimenting with them and building new ones. Since I like to check out all the bands and because I do a lot of portable operation my antennas are pretty simple. Here is what I have:

Inverted L – Up 35 feet and 220 feet long. This antenna is connected to my radios via an AH-4 antenna tuner, the internal tuner in my rig or a QPAK antenna tuner. The antenna runs east/west and, with my tuner, gives me all or partial coverage of all bands from 80 meters to 6 meters. I experimented with this antenna for several months, adding station grounds, radials and adjusting its length and height to get it working well. I made the antenna from a scrap length of CAT-5 networking cable.

· 40 meter dipole – I had an old G5RV floating around and I strung it up about 25 feet between a few trees in my yard. I connect this antenna to my AH-4 tuner or directly to the internal tuner in my radio. It works well on 40 meters through 6 meters. Since it runs north/south it complements my “L”.

· Force 12 40 meter vertical dipole – This is a really neat antenna. It is car portable (breaks down into 4 foot sections) and can be setup in about 30 minutes. It comes with great instructions, a series of matching coils and all the hardware you need to get it up and running. I’ve learned a lot about dipoles and antenna matching methods playing with my Force 12. I plan on setting it up permanently at my home so I can use it more frequently. It performs very well and if you set it up for 40 meters and leave off the matching coils an antenna tuner makes it useable on 80 meters through 6 meters.

· Backpack portable vertical whips – Last summer I spent some time designing, building and experimenting with vertical antennas. I now have a collection of verticals that I can strap to a pack or setup in 5 minutes or less. I use these for QRP and occasionally set one up at my house. If you are interested in experimenting with and building your own antennas this is a great place to start. Some hardware, wire, PVC tubing and a selection of whips and ham sticks are all you need. I built 5 antennas for less than $50.00.

· 2m/70cm collinear antenna – A basic omni directional base antenna for 2m & 70cm FM contacts. I’ve also had good luck using this antenna for 2m and 70cm SSB contacts even though most SSB folks use horizontally polarized antennas.

  • My handheld: Icom W32A dual band radio. Nice radio. You can receive on 2m & 70cm at the same time or receive 2 2m or 2 70cm stations at the same time. Not as small as a lot of handhelds but a good size AND you can use a $20 battery pack that takes 6 NiCad’s. Much cheaper than the $80 to $100 battery packs most radios need. This radio costs about $250.00.
  • My first “real” radio: Icom IC706mkIIg. This is a really great rig. I use it as a mobile and as a base. It lets me use 2m and 70cm repeaters during my commute plus it gives me 2m & 70cm SSB, digital and CW for DX’ing, satellites and other stuff. It’s got HF coverage from 160m to 6m and you can get the AH4 antenna tuner which is a very handy device. All around a very solid radio will 100w output on HF, 50w on 2M and 30w on 70cm. You can get one new for about $700.00
  • My base station HF rig: My base station radio is a DC to Daylight Kenwood TSB-2000. This is an all mode radio that covers HF, 6 meters, 2 meters, 70 centimeters and 1296 MHz. The B version is a 100% computer controlled radio. The front panel has a power switch and nothing else! I’ve really been enjoying this radio. The receiver seems excellent, the transmit audio is great and I have received many good reports from other hams. This has become my workhorse rig. With a built in TNC, satellite capabilities, computer control and excellent DSP IF filtering, the TS-2000 is meeting all of my needs. It is a good “bang for the buck” rig at about $1,300. The TS-2000 (has the normal front panel displays and buttons) runs about $1,500 as of November 2004.
  • My 2m/70cm FM mobile: I have a Kenwood TMD700A which I got because it has a built in TNC and APRS. Plus it’s a very good, computer controlled dual band rig with some extra features like cross band repeating and the built in TNC. This is an expensive radio at $500.00 and probably not a good first choice. If you are interested in packet or APRS you can use a program on your PC and any 2m rig (like the 706 or a handheld) to explore this mode.

4 Radio Purchasing Tips

My first piece of advice is: Do not spend too much money on your first radio!

Why? Well, you are also going to need an antenna, wire, coax, grounding rods, dummy loads, test meters, books and all kinds of other things to get on the air at home or in your car. It’s sort of like buying a new car or computer. You need more than just a radio to get on the air. Also, since you are new, you don’t yet know what your tastes and preferences are going to be. So, be careful and go slow.

1. Do lots of research. Talk to other hams and read reviews. But be careful of advice. We hams are a passionate lot and can be blinded by loyalty to a brand or a mode. Figure out what you like.

2. eHam and ARRL are very good resources for information. Use them!

3. Don’t forget accessories: Coax, antenna, ground rods, power supply, desk (for base) or mounting equipment (for mobile) and other miscellaneous startup equipment. These initial purchases can use half your budget but are well worth it. If you skimp here to get a super duper rig you will probably be disappointed or operate in an unsafe manner.

4. A couple of reference books are a good idea: My choices: ARRL Handbook, ARRL Antenna Handbook, ARRL Operating Guide.

5. Used is OK but get help from an experienced ham. eBay has lots of deals but lots of junk as well. A local ham store (if you have one near you) is a good place to buy your first radio even if it costs a little more.

6. Join a radio club. Even if this is not your thing, a membership for a year can give you access to lots of other hams. And, you might like it.

I hope all of this helps you to pick a good first radio. You should check out some of the ham radio web sites. One site, eHam, has thousands of equipment reviews (note: These need to be taken with a grain of salt!). Go to http://www.eham.net. If you are not an ARRL member you should consider joining. Members can access comprehensive and impartial reviews at the http://www.arrl.org website. There is also a technical information section (TIS) that has all kinds of documents on antennas, modes, electronics and other stuff that is good to have. I use these sites weekly.

Have fun and good luck.

Chris KB7YOU


Back to top^