The Battle of The Hams

The star of CBS-TV’s ‘Eye on New York’ Bill Leonard reports on a hobby; amateur radio, that is distinguished by one of the most gruelling international competitions in all sport.

On the night of February 7, 1958, a few moments before 2 a.m., Canadian Army Sergeant Elvin Veale of the U.N. Emergency Force stepped out of his quarters into the bitter night air of the Gaza Strip. He was tense, excited, braced for the job ahead. At the same moment, in a Tokyo suburb, Haruo Yoneda, a Japanese TV executive, pushed back a final cup of breakfast tea and disappeared into the tiny room from which he emerged 48 hours later, glassy with exhaustion, and utterly happy.

Sergeant Veale, Mr. Yoneda, Ludvik Kloucek of the Mongolian People’s Republic, Empty in Johannesburg, Eva and Alex in Casablanca, Nose in Hawaii, this reporter and a multitude of others—from Pitcairn Island to Punxsutawney, Pa.—were about to begin play in the oddest, toughest and by any standards the most international of all sporting competitions. This was the start of the 24th annual DX contest for radio amateurs of the world, sponsored by the American Radio Relay League.

DX means distance in the abbreviated jargon of hams (amateur radio operators)—and the object of a DX contest is for one station to talk to as many other stations in as many other places as possible in a prescribed length of time. The Grand National of the many DX contests sponsored annually by clubs, organizations and magazines in dozens of countries (including Russia) is the ARRL’s affair. There are more American hams (140,000) than in all the rest of the world combined (60,000), and in this biggest of electronic scrambles operators in the U.S. and Canada compete against each other and talk only to foreign stations.

Overseas hams contact only Americans and Canadians. It takes about six months before logs, sent from the six continents, can be tabulated and checked. So this year’s winners won’t be officially known until the results are published in an early autumn issue of QST, the official magazine of ham radio. But on the basis of claimed scores, still subject to cross-checking, George Morrow, W8BKP, of Washingtonville, Ohio, and Robert Cheek, W3LOE, of Catonsville, Md., may be the U.S. high scorers for voice and code respectively. Outside the U.S. Katashi Nose, KH6IJ, of Hawaii swept both the voice and code contests for the first time ever.

These, and the other winners in foreign countries and various sections of the United States and Canada, cart away no cash or golden wassail cups. Certificates (suitable for framing—but barely) are the only visible rewards of this tense and exhausting competition. The thrills are not in the prizes or the honors but in a kind of fish-and-hunt excitement, with a voice 6,000 miles away in Rarotonga or Rio de Oro as the quarry.

Depending on just how serious he is on the subject, the DX contest man will not only kill himself in a contest, but he will spend the better part of a year getting ready for the exquisite torture of 48 hours of almost continuous operating. He will plan, assemble and erect, usually at considerable cost and occasional risk of limb, an endless succession of antennas, designed to make his station sound just a little louder in Minsk than the fellow who beat him out last year. He will memorize (if he doesn’t know them all to begin with) the names and call-letter prefixes of every “country” in the world (there are nearly 300 “countries,” for hams count many islands and possessions as well as motherlands). He probably has written or talked previously on the air with a hundred hams half a world away arranging crucial schedules for the contest period. He has experimented with diet and sleep habits, stay-awake pills and coffee strengths and has literally gone into training for the contest ordeal. He does all these things and, in addition, takes a lot of perfectly sensible abuse from what are laughingly referred to as loved ones, because ham radio in general, and a DX contest in particular, is more fun than beating Yale. It may indeed be true that while golf is a game, bridge a hobby and girls an avocation—ham radio is a passion. Like most passions, it is pretty much a mystery to those who are not in love.

Amateur radio, like the airplane, is no longer a crude Kitty Hawk baby. Once it did take a garage full of fairly frightening equipment to say almost nothing to almost nobody almost no distance away. And it took an odd breed of nose-in-the-formula duck to master the intricacies of the spark gaps, tickler coils and reflex audions, to say nothing of the dots and dashes. Today, a transmitter-receiver combination no bigger than a portable typewriter is on the market, easily capable of regular communication with all parts of the world. It is about as difficult to operate as a home hair-rinse kit.

A great deal has been written about the work of hams in national and local emergencies—floods, wrecks and hurricanes. Hams are proud of their public-service record. Perhaps just as important, and frequently overlooked, is the fact that hams are among the nation’s best ambassadors abroad. An estimated 10,000 conversations between U.S. and foreign hams take place every day. The Voice of America considers ham radio of such vital international interest that one of its few programs in English, beamed to Europe and Asia, is a weekly ham show.

There are hams who are housewives (girls allowed) and bandleaders (Gene Krupa), politicians (Herbert Hoover Jr.) and comedians (Arthur Godfrey), kings (Prince Abdullah Feisal of Saudi Arabia) and writers (Ernest Sweet Smell of Success Lehman), ship captains (Kurt Carlsen of the ill-fated Flying Enterprise) and captains of industry (Hazard Reeves, president of Cinerama), guardians of the air (Air Force Vice-Chief of Staff, General Curtis LeMay) and of the seedy (New York Prison Warden Ed Dros). There are hams who are doctors, lawyers, and a sprinkling of Indian chiefs, in India.

Of course, every American knows how radio works, just as he understands television, refrigerators, reciprocating engines, women’s minds and other everyday miracles. But we shall risk a word about how amateur radio fits into the broadcasting scheme.
Radio energy can be pictured as waves, all traveling at the same speed, the speed of light (light, incidentally, is just very, very short radio waves, and our eyes a remarkable radio receiver that tunes in on light waves). Some radio waves are long, only a few of them passing a given point each second. Others are short waves, hardly any distance between crests, but many waves passing a given point each second. The wave lengths used for regular broadcasting are quite long (around a quarter mile from trough to trough). TV uses much, much shorter wave lengths, its channels falling in the so called VHF (very high frequency) and UHF (ultra high frequency) range.

Most of the bands assigned to hams fall in the wave lengths in between, where almost all long-distance radio transmission takes place, not only amateur but military, plane to plane, ship to shore, commercial services, international broadcasting and overseas radio telephone. In the range between 10 and 100 meters the radio waves exhibit the remarkable property of bouncing off a vast electrified layer of the upper atmosphere, called the ionosphere, and returning to earth thousands of miles away. It is a tricky business predicting just how and when which waves will bounce how far, for conditions change violently almost minute to minute, according to a dozen factors, including the season of year, light, darkness and sunspot activity.

Hams can operate in seven narrow ranges, the so-called 10, 11, 15, 20, 40, 80 and 160 meter bands where international DX is common. In addition other VHF and UHF bands are set aside for more or less local work. Hams can use either voice or code, the original and still popular dot-dash method of radio communications. There is too little space on the highways of the ether for the great number of stations traveling on them. So the ham at his own station has to contend with the problem of interference from other hams, as well as the never-ending job of keeping his gear in workable shape. In the early TV days neither ham equipment nor television sets were designed to keep the ham signals from interfering. Now, ham techniques and equipment and TV receivers have improved to the point where television interference from amateurs is a steadily diminishing problem.

Actually, ham radio (ham is a 50-year-old corruption and contraction of amateur) is not simply one activity but many. For the competitive, the rigorous contests are available. But just as all motorists aren’t race drivers, so most hams pursue quieter aspects of the hobby. For the tinkerer and do-it-yourself addict there is equipment to put together, tear apart and put together again, equipment handsome enough and complicated enough to satisfy any hi-fi bug.

The gabber gets a chance to talk endlessly on the airwaves, and the listener can eavesdrop to his heart’s content. It’s not unusual for round-table Kaffeeklatsch QSOs to embrace a dozen hams all on one wave length, but located on all six continents. English is the international ham language. English, plus a set of pidgin abbreviations like OM for old man, hangovers from the all-code days when contractions were the natural result of attempts to speed up dot-dash conversations. Also hams use some of the international “Q” signals, which translate, in any language, into key phrases. A QTH is a location; QRN is static.

There is a little of the collector in us all. Hams carry the stamp dodge one better. For many of them it isn’t enough just to have made contact with the remote Russian republic of Uzbek. Who would believe there was such a place? So every ham has his own QSL, or confirmation cards, proof that the QSO (communication) took place. Cards from all 48 states earn a special Worked-All-States certificate. Even tougher is a DX Century Club award, confirmations from 100 countries. A couple of thousand hams have this one, and a handful have cards from 275 countries, which are almost all there are. Another award (issued by the ham magazine CQ) divides the world up into 40 artificial zones, and the trick is to get cards from hams in all of them. Zone 23 is mostly tundra and Tibet, and hams there are as rare as centerfielders. Robert Ford, an R.A.F. radio operator, put Zone 23 on the map, operating from a monastery for a few months eight years ago. Then he was captured by the Communists and became famous as a man who survived five years of attempted brainwashing and Red torture. When he was released in Hong Kong three years ago, the first Westerner to greet him was a British colonel. The officer was a ham first and an Englishman second. He threw his arms around Ford and cried, “Thank God you’re alive, Bob. I’ve been sweating out your QSL card for six and a half years.”

Some hams concentrate on message handling (two New Jersey high school boys have handled over 1,500 telephone patches—relays—for our Antarctica base personnel), others get their kicks out of Civil Defense work and still others use their sets only to keep in touch with one or two friends who are also hams. Just as strangers almost always start to converse in generalities, often inanities, so do hams. The wonder is—and this is the secret thrill of the game—that you can talk at all, that the little black box you built yourself puts your voice and your mind’s eye into the home and the consciousness of a human being who may be a missionary in the Congo, an undertaker in Sweden or a schoolboy in Uruguay. Whoever he is you will call him by his first name, even if—and this has happened countless times—you are an Air Force mechanic and the other ham is a four-star general. You will probably not know, and if you do you won’t care, whether the lad with the outstanding signal on the high end of 20 meters is tall or short, black or white, Democrat or Republican, Jew or Gentile. And any ham can tell you something about the meaning—or lack of it—of national boundaries. The chances are the fellows he likes to talk to most live a day’s flight and a visa away. Through radio they are in his “shack” daily.

To this aficionado, who has been hamming for just a quarter century, and whose shacks have included an airplane over Addis Ababa, a chicken coop in Vermont, a movie house on Broadway and a hotel balcony in Haiti, the ham DX contest is the hobby at its zestiest. The big one just concluded embraced four weekends in February and March—two weekends of 48 hours each for voice operators, two for CW (code) men. There is no law, except common sense, preventing a single operator from working all 48 hours all four weekends. Indeed, the Hawaiian school teacher named Katashi Nose, whose call is KH6IJ, who is this year’s champion, regularly does just that. Along with a Virginian (Vic Clark, W4KFC), Nose is just about the best all-round contest man. He builds his own equipment, including a set of huge antennas on towers he raised and climbs himself. He is equally adept at key or microphone. His endurance seems endless. Favored with a location comparatively close to the U.S., he regularly exchanges contest serial numbers and reports with 3,000 U.S. hams in a single competition. He and Clark, year in and year out, are among the top scorers in the world. The toughest grind is going it alone. The ARRL rules are very strict about single-operator participation. No one else may assist you in any way, either in keeping logs or repairing equipment and certainly not in touching the key or the mike. There is not much more-than the honour system to support the operational rules, although there is a log check on contacts.

A milder version of most DX contest hamming, including this year’s ARRL affair, is so-called multi-operator participation. Here, a group of hams, prizing sleep more than honour, will get together and take turns operating one or more transmitters at a single chosen station. This is equivalent to joining a relay team, instead of going the mile alone. It’s lots of fun, but hardly as demanding.

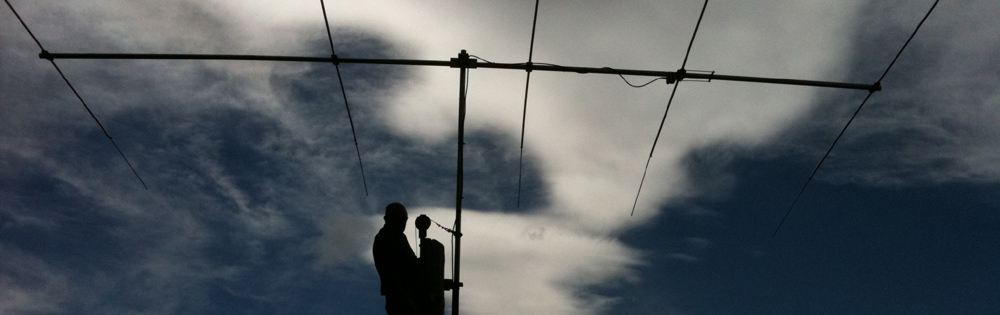
Perhaps the most elaborate multi-operator station extant is owned by Hazard (Buz) Reeves, K2GL, a superb technician, whose electronic know-how has paid off handsomely in business. He is president of half a dozen successful companies, all with radio overtones. A sizable section of his Tuxedo Park, N.Y. hilltop mansion and surrounding grounds is devoted to a ham station de luxe. Dominating the landscape are two towers, loaded with antennas, both over 100 feet high. The antennas on the towers rotate—squirting the radio signals in favored directions.

The shack is a 30-by-35 upstairs room, dominated by three 1,000-watt transmitters, three top-quality receivers, a room-long workbench, tools by the hundreds, a tape recorder and special operating chairs designed for minimum back strain, in one of which this particular operator collapsed as utterly as if he had stopped a Robinson left hook, at the end of contests in the years when he used to go it all alone.

It was in this luxurious setup that we shared this year’s ARRL contest. Reeves flew up from Florida to join six others for one weekend of high-speed contest fun. Reeves does little operating himself. His kicks come from keeping the maze of complicated equipment in operation. Most of the talking was done by Dick Dorrance, a New York advertising executive; Fred Capossela Jr., son of the noted track announcer; John Ryan, an Anaconda Copper heir, who regularly flies across the continent to operate from K2GL because he considers it the best station in the world; Gene Kern, chief of the New York office of the Voice of America; and David Rosen, a young radio announcer.

In the first half hour of the contest we touched all continents. Signals churned into receivers from Japan, New Zealand, Morocco, Portugal, Argentina and nearly every other nook that man has wired for electricity. Contest contacts are quick—an exchange of identifying reports, a time check, serial numbers, hello, goodbye, that’s all. But there was time to find out that one of our first contacts was operating from a 1953 station wagon in the Argentine pampas.

Four hours on, four off was our schedule, and before the next day had gone we had worked a rare station in Sarawak, British North Borneo. One of the most unusual of all countries is tiny Kermadec Island, 1500 miles off the coast of New Zealand. There is only one ham there, and he operates on a band that usually carries just a few hundred miles. But with a lot of effort and the help of a New Zealand amateur, we made contact with him.

A DX contest score is arrived at by multiplying the number of contacts by the number of countries, working each station only once. But as you operate on a different band of frequencies you can contact the same station all over again for another multiplier. It’s quite a trick to catch the same overseas station on all HF bands; in fact, not two stations in an average year manage to swing it. But luck was with us, and in a single four-hour period we talked to Bill Vrooman, HH2Z, who runs Haiti’s International Country Club resort, on all seven bands.

The thrills piled up, but so did the problems. Sunday morning the rotating mechanism on one of the towers jammed. We operated at something like half-effectiveness, while Buz fixed it in two hectic hours. Toward the end of the contest a power transformer went west. John Ryan figured out a way to make a replacement spare do the job. Somewhere along the line we were inspired to fashion an extra antenna on the off-chance that it might be useful on a little-used frequency. It wasn’t.

At the end of the weekend we had exchanged reports with 600-odd stations in exactly 100 countries, a creditable score, considering we had only participated one weekend out of two. It was far from a record. We had simply had our fun—enough to tire but not exhaust.
But around the world, Veale in the Gaza Strip, Yoneda in Japan, Nose in Hawaii, and a hundred others who had gone it alone staggered red-eyed to their sacks, surfeited with DX, the voices of the whole earth ringing in their battered ears, vowing they would never go through anything like that again. And they won’t. Not until next year—when it’s DX contest time again.

This article was written by Bill Leonard W2SKE (SK) Bill worked for the New York Post back in the 1950s and was a ham for most of his life aside from being an award winning journalist. Many of the icon legends of ham radio in that period are now SKs but their exploits still live on. Little has changed in the amateur radio contest scene since then. The equipment is far more sophisticated, the antennas a bigger and computers control virtually everything in the station. What does remain is the keen sense of competitiveness to win for your section or division or country or internationally. Contesting is an addiction that refuses to go away. It just gets bigger every year.

73, Lee ZL2AL

HF Amplifiers versus Antennas by NT0Z

One Ham’s Opinion By Kirk A. Kleinschmidt, NT0Z

Think you need a shiny new linear amplifier to chase away your HF radio blues? Think again. What you probably need is a better antenna! Here’s why….

Let’s start by eliminating any thoughts of fairness and equality regarding this article’s handling of the age-old philosophical struggle between amplifiers and antennas. More than a few hams will take exception to my biased statements (common when trampling sacred cows and sneering at tradition), but if you’re a typical beginning ham, you’re probably wondering whether to buy an amplifier or improve your antenna system—or maybe both.
It’s a logical question. You want to improve your station’s signal quality, make more QSOs, work more DX stations, rack up higher contest scores and chat with others while enjoying armchair copy. You want to know whether amplifiers are a good investment, whether they’ll require additional equipment and services, whether they’ll provide the boost in readability you’ve been desiring and so on.

By now you’re thinking that I’m an “antenna guy,” and that I’m here—through this article—to persuade you to improve your antenna system. You’re right! But beyond the many nuts and bolts reasons detailed herein, I’d like you to at least consider a few philosophical reasons to keep your power output at barefoot levels (or less!). Then, if you’re not convinced, we’ll take a look at the cold, hard facts about amplifiers and antennas. Amateur Radio’s Middle Path Amateur Radio operation in the US is constituted as a radio service, with rules, regulations and goals that go beyond the interest of mere hobby operation. In becoming licensed hams, we agreed to play by those rules.

One of the most important rules compels us to use the minimum transmitter power required to communicate. That doesn’t rule out the use of linear amplifiers, of course, but it does put a damper on their indiscriminate or habitual use. Powering your amplifier through your shack’s light switch certainly violates the rule, as does running maximum legal output power when chatting with the gang across town (or when propagation clearly doesn’t require it). The minimum necessary power rule is designed to protect us all. It promotes responsible, considerate operation. Try it sometime! Reduce your 100-W signal to 50 or 25 W. Thanks to years of low-power operating, I know that you’ll maintain effective communication most of the time. You’ll also improve your operating skills, enjoy a greater sense of achievement and gain an intuitive sense of propagation. By the way, the FCC’s minimum necessary power rule isn’t suspended for contest operation, to work DXpeditions, etc. About the only open-and-shut case for the automatic use of maximum available power is for emergency communications. When someone’s life is on the line, the more power the better. That kind of service is what the Amateur Radio Service is all about.

Skill Versus Brute Force
Long before David and Goliath had their epic battle, skill has been tangling with brute force. I’m sure you have your favourite analogy. Basically, it comes down to the fact that any idiot can fire up a water-cooled Voice of America-size transmitter and blurt out a whopping signal. I place hams who take this approach in the same category as the guys who screech the tires on their 1-ton pickups or water their lawns during drought emergencies. Both are equally impressive, I’m sure. On the other hand, if you align yourself with the Davids of the world, substituting skill and persistence for brute force, you’ll be in better company—and you’ll be upholding the tenets of the Amateur Radio Service. The Golden Rule Hams treading the Middle Path are concerned about others—hams, neighbors, family members, etc. They try to fit in, to get along, to accommodate a community of interests in addition to their own. They practice the Golden Rule Do unto others as you would have them do unto you (reasonable variations notwithstanding). As hams who comprise a federally licensed emergency service, we enjoy certain protections from unreasonable local restriction.

These privileges are welcome and necessary as a whole, but they can be easily abused. Just because we can transmit a 1500-W signal doesn’t mean we should. Just because we can erect a 200-foot-high antenna tower doesn’t mean we should. Hams who follow the Golden Rule integrate their radio pursuits with the pursuits of others—not because they have to, but because they want to! Governments can’t legislate common sense. That’s up to us. Okay, that’s the end of my emotional pitch for restraint. If you’re still tempted to reach for the power switch (the high power switch) or dig into your rainy day fund to purchase an amplifier, let’s look at the facts.

The Ham Next Door
To start, let’s assume that you have a typical shack. A 100-W transceiver graces your operating desk and “talks” to a coax-fed dipole (or two) through a 300-W antenna tuner. Thanks to the tuner, your rig can happily put out full power regardless of actual antenna/feed line SWRs on the various bands you work. You use the same setup as your “Elmer” and most of the guys in the local radio club. Uncounted thousands of hams have used similar setups over the years, so they must work pretty well, right? Maybe. But maybe not. In fact, you might have noticed that working stations on some bands doesn’t seem as easy as it should—especially DX stations. You might even be dreaming of solving your problem by cranking up the power. By adding a gleaming, glowing monster amp to your modest shack, you might think, those stations with once-marginal copy will respond with ease. It’s a comforting image, but it’s probably more fantasy than reality. Although you may not yet know it, you’ll likely get a lot more signal for a lot less money if you upgrade your antenna system before shelling out the bucks for an amplifier.

The Price of Power
Let’s boost our signal a step or two at a time and see how the decibels stack up against the greenbacks. If your amplifier budget is modest, a small solid-state or single-tube amplifier will boost your 100-W barefoot signal to about 500 W. That’s enough to be noticed, or so you think—but just how noticeable? Here’s the law every amplifier has to measure up to Every time you double your power output, stations that are receiving your
signal hear a 3-dB increase in strength. That’s half an S unit! To twitch the needle a full S unit you need to quadruple your power output (a 6-dB increase)! The power output progression looks like this 100 W doubled to 200 W equals a 3-dB increase. Next, 200 W doubled to 400 Wequals a 6-dB increase. Then, 400 W doubled to 800 W equals a 9-dB increase (exceeding the output power of our entry-level amplifier). Finally, 100 W times 10 equals 1000 W, a 10-dB increase in power output. Our 500-W output amplifier gives us a smidgen more than a one S-unit boost on the other end (see Figure 1). That’s not much especially when you consider the cost.

Figure 1
Fig1Spend a wad of cash on an RF power amplifier and what do you get? Let’s assume that we have an average conversation in progress on a quiet band. Your current 100-W signal pushes an S meter on the receiving end to S5. Increase your output to 500 W and the other guy’s meter might slide up to a tad more than S6—a change he won’t even notice. Turn on the 1000-W afterburner and you’ll make his meter twitch almost to S7. Oh boy! Yes, he’ll probably notice a difference now, but he heard you well enough at S5, didn’t he?

More Power
So, you want to run even more power? Using our calculations from before, boosting your signal to a kilowatt output provides a 10-dB shot in the arm. That’s just under two S units on the other end—S3 to S5, S7 to S9, etc. That’s enough of a difference to be noticed, but still not enough to “burn down the barn.” And by the way, the most affordable kilowatt amplifiers cost about $1500. If you really go for the gusto and buy a legal-limit amplifier, your 1500-W signal will be about 12 dB stronger than your “barefoot” transceiver. Because of the “price of power,” 1500 W is still only two S units stronger! And a legal-limit amplifier is hardly a casual purchase. It’ll set your wallet back about $2500.

Hidden Costs
Don’t think you can get away with just an amplifier! The power output curve is often deceptive. For example, above 300 W output or so, you’ll need a beefier antenna tuner. Expect to spend up to $500 for a good one. And don’t forget about the ac mains, either. You can probably get away with running a 500-W output amplifier on 120 V ac, but beyond that, it’s 240 V all the way. (Don’t believe me? A 500-W output amplifier runs 1000 W input power. That’s 4.5A at 240 V. With your rig added in, that’s more than 10 A. Believe me, the lights in your house will “jump” to the rhythm of your code key or your spoken words!) Chances are good that you won’t know how (or won’t want) install that 240V line yourself, either. The materials and an electrician to install them likely will total $300 to $500. Many first-time amplifier users don’t consider their beast’s power supply requirements until they’ve set up the amp and started “browning out” the rest of their house! If this is you, you’ll be lucky if you don’t trash your TV set or your home computer in the process of “modulating” your 120-V power feed! If you live in an urban setting, don’t neglect the potential “public relations” costs of firing up a killer signal in the midst of all those consumer electronics devices. I know…you can legally stand on the solid rock of FCC-mandated power output limits—but be warned that it can be a lonely vigil.

A Better Way?
To save wear and tear on your neighbours  fellow hams, your wallet and even your house wiring, consider improving your antenna system before investing in an amplifier. Here are some ideas to get you started One almost universal way to get out more signal is to get your antenna(s) farther up in the air (your present antenna or a new one). Build a taller mast, find a taller tree or put up a tower. If that dipole just isn’t cutting it, put up a contest-winning and DX-catching secret weapon a full-wave horizontal loop for 40 or 80 meters (up as high as possible, of course!). Feed it with coax and use a tuner on bands above the fundamental frequency. That’s a “cheap ‘n’ dirty” way to snag an extra 2 to 10 dB, depending on frequency.

Disconnect the feed line from your coax-fed single-band dipole, the one you try to use on several bands, and replace with 450 ohm ?ladder line (Figure 2). With a coax feed, even though your antenna tuner may be presenting a happy impedance to your transmitter, feed line losses due to high SWR may slash your signal by 6, 10 or 25 dB, depending on the band and the size of your dipole! By using 450-??open-wire line you’ll likely reclaim most of that lost power. Now that’s a 6 to 20-dB shot in the arm that anyone can afford!

Figure 2
You can increase the performance of a simple dipole by using low-loss open-wire 450 ohm windowed feed line.Fig2

This is one of the easiest, inexpensive antennas for the HF beginner. Just string up a dipole made of two equal lengths of copper wire. Don’t worry about the overall length; just make it as long as you can. Connect the feed line to the center insulator and run it back to an antenna tuner with a balanced output. Attach coax between the tuner and the radio and you’re in business on several bands! For less than the price of an entry-level amplifier you can buy a multiband beam antenna and a decent rotator. This dynamic duo, mounted reasonably high, will offer a 5 to 7-dB steerable improvement to your signal. Remember Amplifiers only boost your transmitted signal and do nothing to improve reception. By rotating a directional antenna you can often achieve a double whammy, boosting the signal you’re trying to receive while attenuating signals that are unwanted. For example, if I’m working a European ham from my Minnesota QTH, a potentially interfering signal from an op in Florida—located in the side null of my directional antenna—may drop 25 dB or more! The difference, more than 30 dB of signal enhancement, could never be achieved by a lone amplifier. On SSB, learn the correct use of your rig’s speech processor. There’s another 3 dB (or more) improvement, this time in the modulation department! No purchase necessary!

Aftermath
So, after looking at the cold, hard facts, do antennas win out over amplifiers at your shack? Or will your operating table soon be sporting some heavy iron? As always, the choice is yours. Amplifiers do have their uses especially after you’ve tweaked your antenna farm. Add a 10-dB amplifier to a 7-dB beam antenna and you’ve got a whopping 17-dB improvement in signal strength! That will put you on the map—especially when the
minimum necessary power required to communicate calls for maximum smoke. And when conditions are poor an amp may make the difference between being heard and being lost in the noise. As long as it’s confession time, let me come clean…. Most of my operating over the past 23 years has been at QRP or barefoot power levels, but I’ve used an amplifier every now and then. The first was one that I built myself from scavenged parts. I was seduced by the possibility of a glowing 4-400A transmitting tube, and I was trying to work DX on 80 meters with a poor antenna. The amplifier helped me put a few difficult QSOs in the log, but collateral considerations forced me to abandon my glowing metal and glass monstrosity. The 150-pound amp was collapsing my operating desk, and its draw from the 230-V mains was overwhelming! I could only use it in the wee hours when everyone else was in bed…. After I put up a decent 80-meter antenna, I never looked back. Given the choice, I’ll take a “killer” antenna instead of a “rock crusher” any day! How about you?

S Meters and Radio Lore
Something needs to be said about S meters: With a few exceptions, they’re inaccurate, non linear and of dubious calibration! Each S unit on a typical S meter is supposed to indicate a 6 dB increase in the strength of a received signal. But it probably doesn’t  Or it might at one frequency on one band (or a few frequencies on a few bands). On other frequencies and modes, however, it might provide readings that are way out in left field. S meters appeal to our senses and to our need to categorize and stratify things in our environment. They can be useful, but we shouldn’t rely on them for precise measurements. That’s what your brain is for. Use it and forget the bouncing needle!

When Less is More
Now that you’ve seen that it takes a whopping amount of extra power to make a noticeable difference in received signal strength, you might be wondering whether the cold equations work in the other direction—and they do!
If you have an okay signal with 100 W, you’ll likely have a workable signal with 25 W, or even 5 W. That’s the Holy Grail of QRP (low power) operation. The power output numbers work, just like before, in reverse.

Let’s say that you have an S9 signal with 100 W output. Cutting your power to 50 W provides a 3-dB decrease in strength. Cutting power to 25 W adds another 3-dB reduction. Therefore, going from 100 W output to 25 W output has reduced your received signal strength by 6 dB—only 1 S unit! By drastically cutting your power output, your signal has dropped from S9 to S8! That’s not a big deal! Dropping from 100 W to 10 W is a 10-dB reduction—less than 2 S units. Dropping to 5 W, the commonly accepted threshold for QRP operation, totals 13 dB—just a smidgen more than 2 S units. Your signal will go from S9 to about S7! Again, not a big deal! Add a decent directional gain antenna to the QRP equation and you’re back in the old ballpark—while running a lot less power. That’s QRP. And it’s a lot of fun.
NT0Z

Heil Headset Reviews

From N2KEN
I’ve used many headsets and microphones over the years. This combination is near perfection. They are comfortable and the HC-5 dynamic element sounds great. The Heil is an excellent headset & very comfortable

When I first opened the box and held the headset in my hands the size of the headset, microphone boom and element enclosure caused a bit of concern. The sturdy (and substantial) mic boom is mounted on one of the two full-sized, closed cup, circum-aural headphones. Was all this plastic, vinyl and steel a bit too much to wear?

The headband suspension self-adjusts and no knobs or click stops are provided. As if made for my head, the headband fell right into place with just the right amount of tension. The headbands fit me perfectly with no bending or adjustment. Once positioned the whole thing stays in place comfortably. Very nice! A set of cloth earpiece covers are provided if that is your preference.

The ear cups attenuate a substantial amount of room noise and allow total focus on the incoming audio. Despite its robust size the Pro Set Plus is not heavy. After hours of wearing them they are still comfortable. The microphone boom requires a bit of persuasive force to bend and rotate it into position. This is a one-time affair, and it hasn’t budged a millimetre since. A small foam windscreen slides over the element housing and adds to the girth of the mic. For those who like a small, discrete-looking microphone this is not for you.

Compared to other studio-quality headphones, the audio is quite good. This is a nice sounding communications headset. Received audio is crisp and clear with ample low, mid and high frequency response. However headphone volume is a bit less than my other phones at the same receiver setting. This is not a big issue since simply increasing the volume level is the solution. The closed ear cups effectively reduce feedback when monitoring your transmitted audio or making EQ adjustments. The phase reversal switch added something to tinker and experiment with.

The HC-5 microphone element has a pleasing frequency response and has a somewhat full sound with a moderate amount of low end. It is not quite as robust sounding as the Heil Goldline full-range element, but gets good audio reports for it’s smooth and clear audio quality. The HC-4 element is also built-in and a small slide switch changes the active element. This element is harsh sounding and favors the mid and higher frequencies – as intended. I’ll save this one for DX work.

Interfacing with my Kenwood TS-940S was easy using the optional adapter cable. You’ll also need a PTT switch – an easy project. A ¼” stereo phone jack is standard on the Kenwood, so receiver audio was plug and play. I also had no difficulty feeding microphone audio into a pre-amp and an EQ for audio experimentation. The mic connection is by 1/8” mono plug and a suitable adapter was easily found in my parts box. An ample length of wire is provided so you can move around your operating position. I like the Heil Pro Set Plus and this is a fine addition to my shack. The construction and audio quality are excellent and should provide years of use.

From Dennis N2CF
The Pro Set Plus very nicely compliments my Kenwood TS-2000. The feel and fit is very comfortable. I am wearing them as I write this, and they have been on my head now for about 3 hours. If not for the microphone being in view when I glance down, I’d forget they were on my head.

Sound quality. I have used many headphones over the years for various applications. The sound quality in the Heil P-S-P is among the best I have ever listened to. The Phase reverse is quite effective. I prefer the “B” setting.

Microphone: Without being redundant with the specs and functions that others mentioned already, the elements in the boom mike on this headset are downright fabulous. The DX / Full Range toggle is a nice touch and as well effective.

Quality: This Headset is attractively made and I find the design configuration to be perfect (for my Melon at least). It’s very apparent that there was no corner cutting done here. The headset also comes with ear covers [put them on the headset, not your own ears :-)) ] and a Mic “poppy” cover. I employ both. If you want a top notch headset/mic combo, I believe you need not look further than the Heil Pro Set Plus. Money well spent.

From K7VI
This is it–the ideal context/DX headset. This is a fabulous headset. If you’re a serious DXer or Contester, buy a set. I’ve been a long-time, not-always-happy Heil customer. I’ve owned three of their headsets prior to this one: One of the open-air sets and two of the Pros. I didn’t care for the feel of the open air set (personal preference) and had a problem with the wiring being flaky in one ear. Both the Pros failed mechanically (ear piece fell off) within a few months. One failed within 30 days.
Honestly, I thought that I was done with Heil products. That thought was a very disappointing for me because I loved the HC-4 audio. Figured it was back to a desk mike for me.

Since then, Bob Heil convinced me to try his new Pro-Set Plus. I’ve now made a bunch of QSOs and run half a dozen contests with this set. I started out REALLY sceptical and worried that I was going to break off yet another earpiece. As time went by, I worried less. By the end of a contest when my eyes are pretty bleary, I’m not thinking about being careful with the headset when I put it on or take it off, so I’ve got some really “honest” hours on this set. I love ’em. Plain and simple.

This set is comfortable to wear for hours at a stretch. They lay well on your ears and the band is comfy for many hours at a stretch on the top of your head. The physical adjustability of the mike is perfect. The weight of the set is a great balance of feeling substantial and “worth” the money with airy comfort.
The ear pieces, though. That’s what I was worried about. I already knew the other stuff was good. Bob’s redesign of the connecting mechanism seems to have yielded exactly the results he (and his customers) desired. When I’m thoughtful, I use both hands to take the set off. When I’ve been trying to break the TN pileup with no success and I strip the phones off my head one-handed, well, I’ve put the set to test and it’s stood up beautifully.

There’s nothing I can add about the microphone’s performance that you haven’t read in a dozen other places. It’s premiere. The speakers are further improved from the Pro-Set. I really, really, REALLY like the speakers in these headphones. I think that you will, too. Another minor, positive note: The cord from the phones to the rig is of ample length.(about 8 feet) so that I can roll around the shack without worry of jerking the phones off my head (ever had that one happen to you?!?). I love the quick connect to the mike input on the rig. When the cord gets tangled it takes 5 seconds to disconnect, untangle and reconnect. Very nice.

So, I’m a fan of this product. Bob Heil has won me as a fan with his personal service, superb product performance, and successful redesign. The mechanical aspects of this set now match the near-legendary talk/listen audio performance.

Achieving the Impossible.

They say that nothing is impossible however, achieving DXCC on the VHF or Lower HF bands is very difficult indeed. 160M DXCC is very rare in New Zealand. Jim Robertson ZL2JR (now a SK) hung his certificate up on the wall with a 131 entity total. I had the pleasure of looking through Jim’s cards a few years ago and some of them are difficult to work on 20M let alone actually working them on 160M. Jim was well known around the world for his booming signal which was due in part to his superb location on top of the Plimmerton Hill with 360 degree views and no obstructions. He was a frequent participant in the Stew Perry “Top Band” contest giving rare ZL contacts to participants on both SSB and CW. I am still amazed at Jim’s achievement.

It takes years of dedication and sore ears to finally get that elusive 100th card. Greg, ZL3IX is the only other recipient of the award on the current DXCC list with over 150 countries confirmed. It is rumoured that Roy ZL4BO had over 200 confirmed on 160M and the late Peter ZL3GQ certainly achieved the milestone. Perhaps there are others that I am not aware of.

One the other end of the scale a VHF DXCC is perhaps even more difficult especially from ZL at the bottom of the world. Bob ZL3TY achieved a VHF 2M/6M DXCC with some moonbounce thrown into the mix. Bob Sutton ZL1RS has been working moonbounce for years on the VHF bands and is probably close to the 100 mark. Chris ZL2DX has been working 2M moonbounce for a few years and is up around the 65 country level using WJST software.

Nothing in ham radio is impossible. The ambition is sometimes thwarted by technology and technology catches up and the once impossible goal is realized. That’s the nice thing about our hobby. There are always goals and challenges!

73, Lee ZL2AL

QSLing by VK4MZ

Hints Tips and Suggestions Kerry Viney VK4MZ

The increasing cost of postage and International Reply Coupons or the purchase of $US 1.00 currency notes, commonly referred to as ‘Green Stamp,’ has prompted many amateurs to re-evaluate their own QSLing practices. The following information is provided to ensure that the confirmation of that rare DX country QSL card is among the pride of your collection.

Comments and suggestions are welcome at e-mail [email protected]

The Contact: When switching the radio on be sure to always have your log book or note book handy, together with a pen or pencil, or your computer terminal up and running with your favourite logging program on the screen. Do not use individual sheets of scrap paper as they tend to disappear amongst the other items in the shack. When on the frequency listen, listen, and listen before announcing your own call sign. This will often reward you with, not only the call sign of the station, but also the name of the operator, his location and the QSL route and at the same time write down the signal report that you are going to give when he acknowledges your call sign, the band, and if you wish, the frequency to which you are currently tuned to. Making this part of your operating policy, ensures that vital information is not lost during the QSO and the after excitement of having secured that rare contact. Be sure that the station has your call sign correct ALWAYS acknowledge the signal report and, during contests, the serial number. ie ‘I QSL 59 and number 143 thank you 73’

As the minimum requirement check that you have written down the following:

Call sign
Date
Time
Band
RST sent
RST received
Contest exchange number
QSL route

If you are not sure you have the call sign correct, continue to listen on the frequency as a station with a strong signal to your location, will possibly say the call sign in his QSO.

Should you feel the DX station did not log your call sign correctly, that is, he called you VK4MS when it should be VK4MZ, I suggest that you put a ‘sticky note’ on your QSL card alerting the QSL manager to that fact. In many such cases the manager will wait a few weeks, and then confirm your contact.

The DATE is ALWAYS written in Universal Coordinated Time. In Australia, the new day commences at 12 o’clock midnight, BUT in UTC time the new day does not start until 10:00 o’clock in our morning. Be sure you enter the date correctly.

Valid date formats are: October 9 1996 , Oct.9.1996, 9-10-1996, 09-10-96, 09/10/96, and, if in North America, the month is written first..10-09-1996, 10/9/96. The time, like the date, is ALWAYS written in UTC time, and starts at the same time as the new UTC day and is expressed as 0000z. There are no spacers between the hour and minute numbers and it is a good practice to always have four digits. When the time is , say 245 it is written with a 0 preceding the figures, eg. 0245z. The small ‘z’ at the end indicates that it is definitely Universal Coordinated Time. NEVER enter your local time. To do so is courting a no reply, and a waste of time and effort. The BAND can be entered as meter band (20m), as frequency band (14 MHz), or as your transmit frequency (14.195).

THE REPORT: Traditionally, the readability and signal strength figures that were exchanged, were reasonably accurate. However, the improvement in the technology of transceivers and the advent of computers with their ability to run sophisticated contesting programs, has seen the universal acceptance of the 59 report. It is easy to repeat hour after hour during a contest. It is easy to hear through QRM and computer programs accept it as both the default receive and sent report.

Should you be given a report during a contest that is different than the standard 59, immediately note it together with the call sign on the log pad. Receiving a non standard report could well indicate to you that the operator is new to contesting and, if it is a new DXCC/band contact and you will need a confirming QSL card, it is advisable to put the non standard report on your QSL card. Be sure to note the contest serial number sent to you, for later insertion on your QSL card. The QSL manager is more easily able to find your contact amongst the many hundreds made over the contest period.

During a contest it is not always convenient to ask the QSL route, particularly if the station is making rapid contacts. It is a more prudent policy to obtain the information from other sources, which are dealt with in detail in a latter section.
The QSL Card: The size of your QSL card should be 140-145mm long by 90mm wide. This will fit into a standard size, in terms of Australia Post size and weight category for minimum airmail rate to all parts of the globe. The paper should be of card thickness and of good quality.

Some QSL cards are one sided only, showing all relevant information, others are double sided with a feature such as the QTH or a local scene and may be a single colour on a plain background such as white, or a multi-coloured. Whatever your choice, your call sign in thick bold lettering together with your name and location, zone, Maidenhead locator and previous callsigns, if any. A single sided card will also have a ‘QSO’ block printed ready for you to enter the relevant QSO details. The front of a double sided card will have the same information with the exception of the QSO ‘block’. The reverse of your card should also have your call sign in large lettering .

Your complete postal address should also appear on it together with the QSO ‘block’. The current tendency is to have the information across the card rather than along it. Most computer printers will handle single cards feed in this direction. Your card needs to have a place near the top right corner for the ‘Via____________’ which needs to be readily seen by the outwards QSL Buro manager. Other details can be seen on the samples.

ALWAYS print the DX stations call sign on the QSL card and enter the other relevant details clearly. In this regard, consider that for many overseas amateurs, English is a second language, and while they communicate on the radio, their reading and writing skills may be limited, and so filling your QSL card details in neatly is important to secure a valid QSL card.

The QSL Route: There are two directions available to send your QSL card.
Firstly, ‘via Buro’. All states in Australia have both inwards and outwards QSL Bureau. While, for members of the Wireless Institute of Australia, Buro QSL service is free, some charge a small fee for outgoing cards. Non members of the WIA in many States are able to use the services of the QSL Buro, but pay an appropriate fee for both their inwards and outwards QSL cards. Because both Australian and Overseas burro’s forward cards by surface mail postage, it can take up to one year to reach their destination, and a further year for you to receive your QSL confirmation.

Should your card be going to another station or to another country for confirmation, be sure to fill in the ‘Via_________’ section of your card so that the outwards QSL Buro manager knows which group to put your card with.
Secondly, ‘via Direct’. This is where you will send your QSL card by airmail postage direct to the station operator or direct to his nominated QSL manager. The QSL manager is a volunteer who is putting a service into the radio hobby with very little financial gain, if any, but receiving the satisfaction of being able to confirm a new DXCC country for many amateurs, and collecting the postage stamps if philately is an additional hobby.

The QSL manager is often appointed by the station operator because the DX station resides on a remote location such as the Antarctic or on an isolated island such as Crozet in the South Indian Ocean. The operator may reside in a country where the postal services are not as secure as those we enjoy here in Australia. It is prudent to note here, that mail from amateurs has money enclosed in the form of International Reply Coupons, purchased from the local post office, or American $1.00 notes, and a nice Australian postage stamp on the outside. The sale of any of these items by a postal worker can supply a healthy meal for his family in some parts of the world. Hence the roll of the QSL manager who handles many hundreds possibly thousands of cards for other amateurs.

The QSL Address: There are a number of sources at your disposal from which you can obtain the correct postal address. The Callbook is an annual publication and is available in two volumes, one for North American Listings and the other International Listings, and is available from amateur radio retailers and from the Wireless Institute of Australia bookshops. It is also available from the various Hamfests held throughout the year.

The Callbook is also now available on CD ROM disc from good amateur radio retailers, with both the North American and International Listings on the one disc. The callbooks contain a complete listing, as at publication time, of all of the licensed amateur radio stations throughout the world. Because of the huge volume of callsigns and cut off publication dates, the printed version will lack the more recent call sign allocations, and this gap is filled from other printed publications.

The weekly newsletters produced by various amateur groups both in North America and Europe contain an ever changing list of current QSL addresses and routes. These are obtained by an annual subscription and are airmailed on a weekly basis.

Monthly publications such as the Amateur Radio produced by the Wireless Institute of Australia and the commercial magazine obtained from newsagents, Radio and Communications contain QSL routes and addresses. A large listing of QSL routes and manager addresses is published annually in Germany and a small, but very useful listing, is published annually and inserted in the January issue of the Japanese 59Magazine.

For those with computers, Personal Data Applications in Georgia, USA, has a QSL manager list on 3 1/2 inch disk and is available on either a monthly or bi-annual subscription.

Several Australian packet systems have access to manager lists and a call to your friendly sysop will give you details on how to access it. The Internet has a number of QSL manager databases available.

The Posting Process: The size of the envelope is important, both from Australian Post
standard size envelope and what will be placed inside it. DO NOT use the small airmail envelopes available in many supermarkets as you could well find the returned card has been folded over in order to fit inside. Besides your QSL card, you may wish to include a postcard of your area to show where you reside. I suggest you use a size C6 which is 115x162mm. A packet of 100 is reasonably priced and is available from supermarkets, stationers, and Australia Post offices. Airmail stickers are freely available and should you use an airmail rubber stamp only use a blue ink pad. The mail sorter is glancing for a blue mark, not a red or green one and instinctively places the blue marked one in the airmail direction.

PRINT the address neatly on the envelope. NEVER, NEVER put a call sign on the envelope ANYWHERE. Should you not know the name of the operator, write ‘The Manager’, Box xyz etc. Next, on another envelope neatly print your own address, being sure to include Australia at the end. Fold this envelope neatly in half and insert into the one addressed to the DX /manager being sure to place the folded section in first, so that, when it is opened at the other end with a knife or similar tool, the enclosed envelope is also not slit in half. It is essential that you enclose in your letter a form of finance to enable the DX station/manager to purchase a local postage stamp to return your confirmation QSL card. This can take the form of an International Reply Coupon, available from Australia Post and is the equivalent to the minimum airmail letter rate. One IRC is sufficient for letters from North America and Japan but from Europe three will be required.

A second alternative is to purchase US$1.00 notes from your local bank. One US$1.00 is sufficient for mail from North America, but not from Japan, and three US$ are required for Europe. For Japan one IRC will cover the return postage. A third method is to put the correct value of mint postage stamps of that country on the envelope, if your local stamp dealer has some among his stock. If you are sending your letter to a developed country, a normal rate postage stamp is ok. However if it is going say, to a third world area you can ask the post office for a printed label stamp for the value required. This is less attractive than a conventional postage stamp and will reduce the likelihood of your letter going astray. The attaching of one of the small green customs declaration stickers filled in as ‘used card’ and ‘ncv’ (no commercial value) will add an air of security to your letter, reducing the risk of it disappearing.

Attention to the above details will ensure the maximum return of your QSL requests.

73 and good contesting, Kerry VK4MZ

Ideas For Radio Clubs

Is Your Ham Radio Club a General Purpose or Specialty Club by Scot, K9JY?

Ham radio clubs are often thought of as the bedrock of amateur radio. As one who has both criticized ham radio clubs as well as made suggestions for helping improve them, I want to take some time to talk through what makes a great ham radio club.
The very first decision that needs making when forming a club is this one: do you want your club to be a general purpose club or a specialty club?

Some definitions

General purpose radio clubs are those clubs that want ham radio operators from the many different subsections of the overall hobby. You want to attract DX’ers, contesters, VHF enthusiasts, rag chewers, digital enthusiasts, builders, CW operators, SSTV types and people who love to work satellites and bounce signals off the Moon. QRP and QRO. Public service and emergency communications.

Specialty clubs, on the other hand, want to focus on one specific area of the hobby. The DX club. The contesting club. The repeater club. The digital club.
The very first thing you need to do is decide what type of club you want to be. These different types of clubs are managed differently, promote themselves differently and approach club membership differently.
If you are not in a large enough area to support specialty clubs, you may by default need to be a general purpose radio club so that ten people can get together as a club. That’s just fine, but you need to then manage the club as a general purpose club and not a specialty club that happens to have three other people in it.
And for established clubs, you need to periodically take a hard look at what type of club you actually are and not what your mission statement says you are. Is your entire club now consisting of DX’ers and Contesting? Maybe you should split in two – or focus on getting other hams with more diverse interests involved in your club.
Your club can be a general purpose club or a specialty club, but not both.

Radio Club Program Ideas
• Have a guest speaker. Topics can include ARES, Skywarn, antennas, radio history etc.
• Show a video.
• Show a Power Point.
• Have an auction. Club members can bring items, with a portion of proceeds going to the club.
• Go on a field trip. Visit local radio or TV stations, electronics firms or police communications center.
• Radio trivia game. Ask questions relating to radio, with prizes for most correct answers.
• Show and Tell. Members bring items and describe them.
• Homebrew night. Members bring a radio construction project and describe it.
• QSL night. Cards are shown and stories told relating to the contacts.
• Technology updates. Details of new modes (digital, APRS) and circuits.
• Equipment reviews. Owners of new ham equipment describe and evaluate it.

Scott K9AY

Kite and Balloon Antennas

The ‘Aerial’ Antenna Section

The balloon kite arrangement I use involves the Helikite Sky Hook or the Lightweight Helikite . The Sky Hook is larger than the ‘bird scaring’ range of lightweight Helikites, and will fly in wet weather. The two types of Helikite are highlighted.

Wind Max Altitude_Helium Capacity Lift No wind Lift in Wind Max
Vigilante Helikite 0.15 m3 0.03 Kg 0.15 Kg 25 mph 1,000 ft

Lightweight Helikite 0.15 m3 0.06 Kg 0.18 Kg 25 mph 1,300 ft

Skyhook Helikite 1.0 m3 0.4 Kg 1.5 Kg 28 mph 2,000 ft

Skyhook Helikite 1.3 m3 0.7 Kg 2.5 Kg 31 mph 2,500 ft

The Helikite Sky Hook will just about lift the quarter wave (40 metres) of number 14 flexiweave wire without wind, but any breeze at all takes it right up with the additional generated lift. The designed angle of flight of the Helikites is 45 degrees or a bit more, making it not quite a true vertical but certainly a lot more vertical than an inverted ‘L’.
To deploy the balloon/kite antenna, the 12 metre SCAM12 mast is nested at 2 metres, a 4 metre fibreglass stub is inserted into the top at the 40mm spigot. A 150 kg. breaking strain fishing swivel is attached to the top of the stub to keep twisting to a minimum. All attachments are made with 200 kg. breaking strain Kevlar line. On each side of the swivel is about 10 cm. of Kevlar line. The antenna wire to the Sky Hook is run from a small porcelain insulator at the swivel to the Helikite, with the last two metres being Kevlar attached to a small high strength porcelain insulator. Another swivel at the Helikite attachment point takes care of the last of the twisting. The final bit of additional Kevlar keeps any arc away from the attachment point and saves chasing the Helikite across the country as it flies to 1 to 2 thousand feet and drifts rapidly away. (My insurance has paid for two escapees that took off)

The Sky Hook is then released, the 40 metres of flexiweave antenna wire played out, and then the pump up mast is put into the full up position, SLOWLY, to avoid strain on the kite antenna wire. The soil of MY QTH (have a look at this link) is very sandy, but I am not far from the North Sea. The antennas for Top Band work well. Here is a plot of the Helikite antenna, shown with a ground loss of about 10 ohms which is a bit high. I have about 60 radials from 45 to 120 feet in length. I think this plot is conservative.

First, Balloons – How Big?????
Now we come to the part about launching a balloon supported tall vertical or protracted inverted L. First of all, you should be concerned about potential shock hazards and high noise levels resulting from wind-induced static. The solution at low power levels is to use a bleeding resistor (or inductor) to the antenna’s ground, high enough wattage )non-inductive) to discharge the static build up at an adequate rate while preserving the electrical characteristics of the antenna. (r > 100,000 ohms, an inductor value depends on frequency). Another way is to do it by making a spark gap. Use a very large gauge of copper wire, say #8. Solder the wire to your ground connection, and to the antenna wire, then with a fine saw, cut the wire, leaving just enough ‘spark gap’ to discharge the static build up, but not close enough to arc under transmit.

Unless you exceed a quarter wave by a significant amount on Top Band, static discharge is not a real problem. A half wave can begin to be a real problem. I have only tried an antenna higher than 60 metres once and there was a significant amount of ‘jolt’ when I touched the antenna feed point before attaching the antenna to the ATU. I normally use an SGC 230 auto tuner which also gives me 80 metres if I go ‘VHF’. Sometimes an ‘L’ network is used for high impedances encountered at 3/8 wave.
Back to the physics lesson, what about the physical (structural) ‘reality’ and security of such a setup. First, there are a few physical laws that control the balloon’s behaviour and here is the lesson.

Sizing for still-air conditions
Material specification. (also good for a small to medium kite)
Thin copper wire: AWG 28 : 2081f/lb (.0005 lb/f); 65.31ohm/1000′ (source ARRL Handbook.)
Support line: 40 pound test BRAIDED NOT MONOFILAMENT at .0001 lb/f (conservative estimate).
I use the wire and the line taped about every three feet. I leave about three feet of antenna wire dangling at the top to keep high voltage away from the support line. I learned this the hard way after bursting two balloons at key down (400 watts) and losing a balloon when the support line burned through. For higher power, larger wire is used, again, the source of the weight of the wire is the ARRL Handbook.

Balloons and Physics
As per Archimedes’s principle, the upward force developed by a balloon is related to the weight of the air displaced by the balloon volume.
Actually the balloon should be sized to carry this net buoyancy (.8045lb) + the weight of the helium (s.g. = .1308 that of air) it carries + the weight of the balloon envelope.

For example, at 500′ ASL you want to launch a 200′ high (= 700′ ASL) balloon able to procure sufficient lift for a .8045 lb antenna and line payload.
Lets suppose that a 40 inch (3.33′ ) diameter of .5 lb envelope weights is available.
By the way, I use Kent Balloons here in the UK for my balloons, but any large commercial balloon supplier will have them. Helium can be obtained from any commercial supplier of industrial gases, here I use BOC, which is listed in the Yellow Pages under industrial gases.

THE CALCULATIONS
Density of air at 500′ ASL = .0754 lb/pi3, at 700 ASL = .0750 lb/pi3
Volume = .5236 x d3 = 19.39 pi3
At 700′ ASL ; Weight of air = 19.39 x .0750 = 1.454 lb
At 500′ ASL ; Weight of helium = 19.39 x .0754 x .1308 = .191 lb
Net buoyancy at 700′ ASL = 1.454 – .191 – .4 = .863 lb
In this case, two of these balloons would be ok for the proposed setup. One at the top of the support line, the other about ten feet down to dampen the sway of the antenna in the wind.
Effects of the wind
In fluid mechanics textbooks, you can find formulas to determine the drag force applied by moving air upon a stationary spherical object. (the balloons)

Fd = Cd p V2 A / 2
Fd : drag force ( lb ) Cd : drag coefficient (no dimension)
V2 : Velocity of the wind squared ( f2/sec2 )
A : Center area of the sphere ( f2 )
Cd = .4 for Re ( Reynold number) < 350,000 Cd = .2 for Re > 350,000
Re = D V / u
D diameter of the sphere (feet)
V Speed of the wind (feet/sec)
u (nu) Kinematic viscosity of air = ~.00016 (f2/sec)
Below is a table that shows the evolution of horizontal pressure (in pounds) induced by various wind velocities (mph) on various balloon diameters (feet)

Horizontal wind-induced pressures on a spherical balloon: Fd (pounds)
V (mph) 3′ 3.33′ 4′ 5′ 6′ Diam
10 .71 .88 .66 1.02 1.5
15 .83 1.03 1.5 10.7 15.4
20 1.5 1.83 2.63 4.1 5.9
30 3.33 4.1 5.9 9.2 13.3
40 5.9 7.3 10.5 16.5 23.7

Here, I will limit the analysis to a worst case scenario, where I will use only common sense to evaluate resulting strain on the antenna support wire. I did that to the table above to generate the table below. Let’s keep in mind these values are somewhat on the safe side. Also, keep in mind that the balloon lifted antenna will have gone almost horizontal by the time the wind speed hits about 15 mph. This is a safety exercise after all.

Estimated side wind-induced strain on the antenna wire (pounds)
V (mph) 3′ 3.33′ 4′ 5′ 6′ Diam
10 3.9 4.1 3.1 4.7 6.9 Safe
zone
15 3.9 4.8 7.0 10.7 15.4
20 7.0 8.5 12.2 19.0 27.4
30 15.4 19.0 27.4 42.7 61.8 Risk
zone
40 27.4 33.9 48.8 76.7 110.
One last table-the physical properties of air

Altitude (ASL) Air pressure Air density Air viscosity
feet lb/f2 lb/f3 f2/sec
0 2116.2 .0765 .000156
1000 2040.9 .0743 .000162
2000 1967.7 .0720 .000164

Practical Considerations
The balloon envelope material quality is also something you should consider before attempting any lift off. If not, you may experience a short lived project. We’ve all air blown party rubber balloons to their max, just to realize that the next day they had shrunk to half their size. The reason being that, due to pressure differential between inside and outside of the stretched envelope, air will just sift through it. Rubber is an elastomeric material built around long organic molecular chain attached one to the other through ramifications (something like a tree), and there are ‘holes’ between these chain elements. Air made up of molecular oxygen, nitrogen, and carbon dioxide eventually finds its way through. So if molecular elements like O2 and N2, that are many times the size of atomic helium (He) can do that, you can imagine how helium would act considering the wide open barn doors these ‘holes’ are, relative to its size.

I don’t think a normal small ‘party’ balloon would be able to retain its full size for more than a couple of hours. So not any off the shelf stock will suffice. That is why I use Mylar balloons instead of large rubber party balloons to support my antennas on calm-ish nights. Sometimes I will use weather balloons that have enough helium to stay up even if a significant quantity gets out.
I have used 8 foot weather balloons, five foot rubber balloons, and Mylar balloons. The Mylar balloon is similar to the Helikite’s and the Mylar envelope will stay inflated for days, whereas the rubber balloons are good for only about eight hours. The weather balloons stay up all night, but really lose size after about five hours. The five footers stay up about ten hours, but they are getting pretty sagged by then.

Now…A word about safety

The DO NOT List
Do not fly your kite or balloon near power lines of any description. If the flying line becomes wet it will become a conductor of electricity with lethal consequences. A highly conductive aerial wire will only add to the considerable danger. Also, remember if the kite or balloon breaks its tether, the dragging wire can cause havoc with power lines some distance away.
Do not fly your kite or balloon if there is the possibility of thunder or lightning. You don’t want to become a lightning conductor. Benjamin Franklin was stupid enough for us back in 1752.

Read the above again!!!!
Do not fly your kite or balloon if high winds are forecast. (Check the hour by hour forecast for your area at The Weather Channel.) You can put in your post code, zip code, or city and this site will give you a good indication if it is go or no go as you can see wind speed and direction forecasts hour by hour. Sometimes the winds will drop overnight so that is why I will use a balloon antenna lifter of some sort then. A dead calm will bring down the kite. In the dark, that is a pain!
Do not fly your kite or balloon near a road, car park, railway line or where there are any moving vehicles.
Do not fly your kite or balloon near farm animals, bird or animal sanctuary. You could frighten or alarm them.
Do not fly your kite or balloon within 5 kilometres or 3 miles of an airfield but check the local regulations in your country.
Do not fly your kite or balloon higher than the legal limit in your country unless you have obtained permission from your local or national Air Regulation Authority. 60 metres is internationally recognised as the limit of vertical height above terrain.
Do not fly your kite or balloon near trees or buildings or your kite may become entangled. There is always air turbulence near them so they are best avoided.
The DO List
ALWAYS use a line in conjunction with the kite or balloon antenna element, NEVER just the antenna wire.
ALWAYS wear gloves to protect your hands. I use leather gardening gloves to prevent painful burns.
ALWAYS ensure that you or your clothing are not tangled together with the flying line or the antenna wire.
ALWAYS seek permission of the landowner before flying, unless it is your property, then just soft soap the neighbours when your kites lands on their roof.
ALWAYS check the wind speed before flying, the higher the wind the more difficult the kite or balloon is to recover.
ALWAYS fly the kite on line the strength of which is determined by its size. The correct line for most lifter kites or balloons is at least 160 pounds.
ALWAYS launch and retrieve the kite or balloon from your hand….never run with it as you could fall and be injured, and look a prat like Charlie Brown!
ALWAYS carry sunglasses (Polarised ones are best) to keep an eye on your line/antenna in the daylight. At night, a torch or flashlight is handy also.
ALWAYS wind the flying line in a figure of eight onto the winding handle, otherwise you may never get the line off again!
ALWAYS replace the flying line if it shows any sign of becoming frayed or damaged.
ALWAYS untie any knots on the line which are not there by your intention. Incorrectly tied knots seriously weaken the flying line.
ALWAYS check the security of knots before flying. I have lost good kites when a knot went, and it was 200 feet in the air.
ALWAYS avoid anyone touching the antenna when you are transmitting. Believe it or not, kids do like kites.
ALWAYS prevent anyone else from interfering with the kite or your equipment while you are operating.

Another few bits of information:
It is important to understand the forces which are involved with kites and balloons. The larger the kite or the balloon, the more it will lift but also the forces of nature acting on it will also be that much more difficult to contend with. A larger kite will fly in mild winds but it certainly will become tougher to handle in strong winds. Should you launch a large kite in reasonable wind and some time later the wind strength increases you could be in some difficulties whenever you attempt to recover it. During the initial learning stages, just be sensible about the wind conditions you are attempting to fly in. The optimum size for a kite is its ability to lift things for any given wind and to be controllable by the operator. It is quite easy to launch a kite into the air but it is another matter entirely when you want to recover it. That is why my kites have been made to reasonable dimensions. They have to have enough lift and be within the ability of a single person to safely fly it in the widest range of wind conditions.

TURBULENCE
Near trees and buildings there is always air turbulence where the wind is tunneled or down draughts could upset the flying of your kite. If you fly upwind of the obstructions the kite is liable to become entangled in branches or obstructions on buildings. The wind close to the ground is usually not as smooth and laminar as it is higher up. Once the kite is airborne you will notice that it becomes steadier with height. You will also find that the wind is generally stronger the higher up the kite is flown. This can be felt with the increased pull on the flying line. Another thing to watch out for is the turbulence created by hills, as this turbulence can extend to a considerable height.

THE FLYING LINE
The choice of flying line is important. Braided fishing line is best and the required strength is at least 160 pounds.. Do not be tempted into using cheap polypropylene line, it will not stand up to the abuse kite flying will give it. Go to your nearest fishing tackle shop and consult with the shopkeeper. Use only the best available. 130 pounds will do, but it also reduces the safety margin.

Author Unknown

Back to top^

Comparing Radios

Apples and Oranges by Fred KI6YN…

I read the letters and complaints about the current crop of transceivers. As an electronics engineer that designs satellite ground stations, I have at least a modicum of understanding of what it takes to make a good rig. Most of the comments I read show complete ignorance about basic economics and electronics. The bottom line is that ‘you get what you pay for’, there are darn few exceptions to that.

I am an amateur astronomer as well as a ham. I’ve found that most amateur astronomers are like most hams; they can cite chapter and verse from advertisements and nonsense they’ve heard from others in the hobby. Instead of investigating and studying, they take the word of others. It seems that this is true in most hobbies. When I first became a ham in 1988, the big push was phase locked loops and phase noise. I was amazed at the nonsense I read and especially the way the specs were quoted in the ads. Only Ten-Tec made sense in that they exclaimed exactly the way they made their measurements and gave realistic baselines. The antenna manufacturers were nothing but con artists with their ads, very little has changed!

I recently bought a Ten Tec Orion; it is a great radio for any price compared to what is on the market. I’ve seen it compared to the K2, another terrific rig…. but they are not even close in design and specifications. Let’s get real, when you get near the top of the performance curves, every little bit cost a lot more than the gain in the middle or bottom of the curve. I wouldn’t want to take the Orion out in the field but wouldn’t hesitate to take a K2. One of the best rigs I’ve ever had was an old Delta 580, and I am still sorry that I sold it. My Icom 761 was a rock solid rig for ten years. It is true that quality control has become an issue in all countries, not just Asia. I had a 756 PRO and was quite disappointed with its performance.

My Omni 6 Plus was a superior rig in all ways but sure didn’t look like much next to the Pro with the pan display and ten thousand knobs, switches and whatever. Of course, the Omni was easier to operate and being direct injection and ham band only, a much quieter rig than the Pro. Remember, the narrower the bandwidth of the front-end, the lower the noise is going to be; general coverage usually implies a large bandwidth for each segment. The tuning knob on the Omni turned like an old pig and the one on the Pro was smooth and well balanced, but the real object was sweet sounding CW both in and out and the Omni won hands down.

So, purchase a big fancy box and impress your friends with your possessions that you purchased and had nothing to do with in the design or stick with the object of the hobby, get a rig that performs both receiving and transmitting well. That is what the hobby is all about. I might mention that I also have a Yaesu FT-847, a great rig for mobile and can do it all. It certainly can’t compete with the Orion at the base station level, but then again, the Orion wouldn’t be very good for mobile and doesn’t have UHF or VHF; the 847 costs about a third of what the Orion costs. See what I mean about Apples and Oranges.
Make a list of those features that are important to you and prioritize it. If the new rigs are too expensive for your budget, the look at some used stuff. There are a lot of classic rigs out there that are quite reasonable. Stop buying based upon advertisements and appearance of the radios and the manufacturers will clean up their own act.

Fred Martin – KI6YN

Coax balun on PVC form

Coax balun on PVC form
My experience is that PVC works fine as a form for high Q RF coils. I’ve measured Qs of up to 450 on loading coils wound on PVC pipe. I’ve appended a paper I wrote on measurements of coaxial baluns wound on PVC forms.

Having access to a Hewlett-Packard 4193A vector impedance meter at work, I have made measurements on a number of baluns, coaxial and otherwise. For my beams I was particularly interested how many turns and on what diameter are optimum for air core coaxial baluns, and what the effect of bunching the turns was (formless). Using the remote programming capability of the HP4193A along with an instrument controller, I measured the magnitude and phase of each balun’s winding impedance at 1 MHz intervals from 1 to 35 MHz. For comparison, I also made measurements on a commercial balun which consists of a number of ferrite beads slipped over a short length of coax. I’ve appended some of these measurements so you can draw your own conclusions.

PVC pipe was used for coil forms. The 4-1/4 inch diameter baluns were wound on thin-walled PVC labeled “4 inch sewer pipe”. This material makes an excellent balun form. It’s very light weight and easy to work with, and I obtained a 10 foot length at the local Home Depot for about 3 dollars. The 6-5/8 inch diameter forms are 6 inch schedule 40 PVC pipe which is much thicker, heavier, and more expensive.

Each test choke was close-wound on a form as a single-layer solenoid using RG-213 and taped to hold the turns in place. The lengths of cable were cut so there was about 2 inches excess at each end. This allowed just enough wire at the ends for connections to the HP4193A’s probe tip. After data was collected for each single-layer configuration, the PVC form was removed, the turns were bunched together and taped formless, and another set of measurements was taken. I have only included the “bunched” measurements in the table for one of the baluns, but the trend was the same in each case. When compared to the single-layer version of the same diameter and number of turns, the bunched baluns show a large downward shift in parallel self-resonance frequency and poor choking reactance at the higher frequencies.

Interpreting the Measurements
All the baluns start out looking inductive at low frequencies, as indicated by the positive phase angles. As the frequency is increased, a point is reached where the capacitance between the windings forms a parallel resonance with the coil’s inductance. Above this frequency, the winding reactance is reduced by this capacitance. The inter winding capacitance increases with the number of turns and the diameter of the turns, so “more is not always better”.

The effects of a large increase in inter winding capacitance is evident in the measurements on the balun with the bunched turns. This is probably a result of the first and last turns of the coil being much closer together than the single-layer coil. An important requirement of these baluns is that the magnitude of the winding reactance be much greater than the load impedance. In the case of a 50 ohm balanced antenna, the balun’s winding impedance is effectively shunted across one half the 50 ohm load impedance, or 25 ohms. A reasonable criteria for the balun’s winding impedance for negligible common mode current in the shield is that it be at least 20 times this, or 500 ohms. The measurements show, for example, that 6 turns 4-1/4 inches in diameter meet this criteria from 14 to 35 MHz.

The measurement data also reveals the power loss these baluns will exhibit. Each of the measurement points can be transformed from the polar format of the table to a parallel equivalent real and reactive shunt impedance. The power dissipated in the balun is then the square of the voltage across it divided by the real parallel equivalent shunt impedance. While this calculation can be made for each measurement point, an approximate number can be taken directly from the tables at the parallel resonance points. At 0 degrees phase angle the magnitude numbers are pure resistive. I didn’t record the exact resonance points, but it can be seen from the tables that the four single-layer baluns are all above 15K ohms, while the ferrite bead balun read about 1.4K. These baluns see half the load voltage, so at 1500 watts to a 50 ohm load, the power dissipated in the coaxial baluns will be less than 1.3 watts, and the ferrite bead balun will dissipate about 13.4 watts (neglecting possible core saturation and other non-linear effects). These losses are certainly negligible. At 200 ohms load impedance, the losses are under 5 watts for the coaxial baluns and 53.6 watts for the ferrite beads.

Conclusions
– A 1:1 coaxial balun with excellent choking reactance for 10 through 20 meters can be made by winding 6 turns of RG-213 on inexpensive 4 inch PVC sewer pipe.

– For 40 or 30 meters, use 12 turns of RG-213 on 4 inch PVC sewer pipe.

– Don’t bunch the turns together. Wind them as a single layer on a form. Bunching the turns kills the choking effect at higher frequencies.

– Don’t use too many turns. For example, the HyGain manuals for my 10 and 15 meter yagis both recommend 12 turns 6 inches in diameter. At the very least this is about 3 times as much coax as is needed, and these dimensions actually give less than the desired choking impedance on 10 and 15 meters.

Measurements
————
Magnitude in ohms, phase angle in degrees, as a function of frequency in Hz, for various baluns.

6 Turns 12 Turns 4 Turns 8 Turns 8 Turns Ferrite
4-1/4 in 4-1/4 in 6-5/8 in 6-5/8 in 6-5/8 in beads
sngl layer sngl layer sngl layer sngl layer bunched (Aztec)
———- ———- ———- ———- ———- ———-
Frequency Mag Phase Mag Phase Mag Phase Mag Phase Mag Phase Mag Phase
1.00E+06 26 88.1 65 89.2 26 88.3 74 89.2 94 89.3 416 78.1
2.00E+06 51 88.7 131 89.3 52 88.8 150 89.3 202 89.2 795 56.1
3.00E+06 77 88.9 200 89.4 79 89.1 232 89.3 355 88.9 1046 39.8
4.00E+06 103 89.1 273 89.5 106 89.3 324 89.4 620 88.3 1217 26.6
5.00E+06 131 89.1 356 89.4 136 89.2 436 89.3 1300 86.2 1334 14.7
6.00E+06 160 89.3 451 89.5 167 89.3 576 89.1 8530 59.9 1387 3.6
7.00E+06 190 89.4 561 89.5 201 89.4 759 89.1 2120 -81.9 1404 -5.9
8.00E+06 222 89.4 696 89.6 239 89.4 1033 88.8 1019 -85.7 1369 -15.4
9.00E+06 258 89.4 869 89.5 283 89.4 1514 87.3 681 -86.5 1295 -23.7
1.00E+07 298 89.3 1103 89.3 333 89.2 2300 83.1 518 -86.9 1210 -29.8
1.10E+07 340 89.3 1440 89.1 393 89.2 4700 73.1 418 -87.1 1123 -35.2
1.20E+07 390 89.3 1983 88.7 467 88.9 15840 -5.2 350 -87.2 1043 -39.9
1.30E+07 447 89.2 3010 87.7 556 88.3 4470 -62.6 300 -86.9 954 -42.7
1.40E+07 514 89.3 5850 85.6 675 88.3 2830 -71.6 262 -86.9 901 -45.2
1.50E+07 594 88.9 42000 44.0 834 87.5 1910 -79.9 231 -87.0 847 -48.1
1.60E+07 694 88.8 7210 -81.5 1098 86.9 1375 -84.1 203 -87.2 778 -51.8
1.70E+07 830 88.1 3250 -82.0 1651 81.8 991 -82.4 180 -86.9 684 -54.4
1.80E+07 955 86.0 2720 -76.1 1796 70.3 986 -67.2 164 -84.9 623 -45.9
1.90E+07 1203 85.4 1860 -80.1 3260 44.6 742 -71.0 145 -85.1 568 -51.2
2.00E+07 1419 85.2 1738 -83.8 3710 59.0 1123 -67.7 138 -84.5 654 -34.0
2.10E+07 1955 85.7 1368 -87.2 12940 -31.3 859 -84.3 122 -86.1 696 -49.9
2.20E+07 3010 83.9 1133 -87.8 3620 -77.5 708 -86.1 107 -85.9 631 -54.8
2.30E+07 6380 76.8 955 -88.0 2050 -83.0 613 -86.9 94 -85.5 584 -57.4
2.40E+07 15980 -29.6 807 -86.3 1440 -84.6 535 -86.3 82 -85.0 536 -58.8
2.50E+07 5230 -56.7 754 -82.2 1099 -84.1 466 -84.1 70 -84.3 485 -59.2
2.60E+07 3210 -78.9 682 -86.4 967 -83.4 467 -81.6 60 -82.7 481 -56.2
2.70E+07 2000 -84.4 578 -87.3 809 -86.5 419 -85.5 49 -81.7 463 -60.5
2.80E+07 1426 -85.6 483 -86.5 685 -87.1 364 -86.2 38 -79.6 425 -62.5
2.90E+07 1074 -85.1 383 -84.1 590 -87.3 308 -85.6 28 -75.2 387 -63.8
3.00E+07 840 -83.2 287 -75.0 508 -87.0 244 -82.1 18 -66.3 346 -64.4
3.10E+07 661 -81.7 188 -52.3 442 -85.7 174 -69.9 9 -34.3 305 -64.3
3.20E+07 484 -78.2 258 20.4 385 -83.6 155 -18.0 11 37.2 263 -63.2
3.30E+07 335 -41.4 1162 -13.5 326 -78.2 569 -0.3 21 63.6 212 -58.0
3.40E+07 607 -32.2 839 -45.9 316 -63.4 716 -57.6 32 71.4 183 -40.5
3.50E+07 705 -58.2 564 -56.3 379 -69.5 513 -72.5 46 76.0 235 -29.6

Ed Gilbert, WA2SRQ

Back to top^

What Does a Pilot Do?

What does a DXpedition “Pilot” do?
I have been asked about being a pilot on a few occasions and recently on the Kiwi DX List. Basically a DXpedition pilot is a “screen door” between the DXpedition team and the 50,000 ham DXers out there that want to work the DXpedition. The pilot becomes the regional collection point for complaints and accolades for the DXpedition. If the pilot didn’t exist then DXers can and sometimes turn ugly. That’s a fact.

DXpeditions teams try to do their best, often under the most trying circumstances and like other forms of human endeavour can sometimes fail miserably at doing their job. The worldwide DX community can often be unforgiving and that leads to some rather bizarre and appalling on air behaviour to disrupt the DXpedition they have lost respect for. Believe me. It happens. The job of the pilot is to be a “sounding board” and a channel for information to and from the DXpedition team.

A typical scenario is a team working short path direct with signals 20 over nine into a region hour after hour frustrating DXers in smaller countries two or three skips away that could easily work them. In other words the DXpedition team band plan will sometimes preclude working rarer areas that really need them. Strangely, South Africa, South America and often ZL/VK suffer. If that info can get to a pilot network, the pilots can usually make the team aware that they are not taking advantage of conditions to work rarer countries. It is real time information such as that which will really help the team to do their job better. One of the problems of DXpedition team members is that they become zombies after a few days of thousands of QSOs, screaming hams, rude behaviour  outrageous pileups, poor food, crap living conditions and weather that is usually 10 degrees too hot or too cold.

As a DXpeditioner it’s sometimes difficult not to get depressed and lose enthusiasm and indeed get really snarky with your customers… the DX community. In fact, a week of high pressure shovelling out pileups makes you lose touch with reality. Pilots love to relay messages of congratulations and accolades to the team from the ham community as it gives them encouragement to carry on and do their job.
One of the more pleasant duties of a pilot is to pass messages to and from the team to their families and to the ham community in the form of bulletins or newsletters. It’s a great job and it also means you get to know a bit of what the guys are up to and with a little luck the pilot’s call may sound a bit familiar to the team in a pileup. As a pilot, I make it my business to put ZLs and VKs in a prominent place on the table so the DXpedition team will be aware of us. It has worked very well before.

Some things pilots does NOT do.
We don’t make individual skeds. We don’t have access to the logs. We don’t pass individual messages to individual team embers unless specifically asked to do so. We do not lose our temper when outrageous requests are emailed to us. We don’t relay individual emails to the team. We try to treat all inquiries and requests equally and fairly.
Some DXpeditions give me very little work. Others have resulted in hundreds and hundreds of emails from around the world that have to be answered. It’s a great job and I love it because of the amazing friends I have made around the world over many years.
That’s what a pilot does!

73, Lee ZL2AL